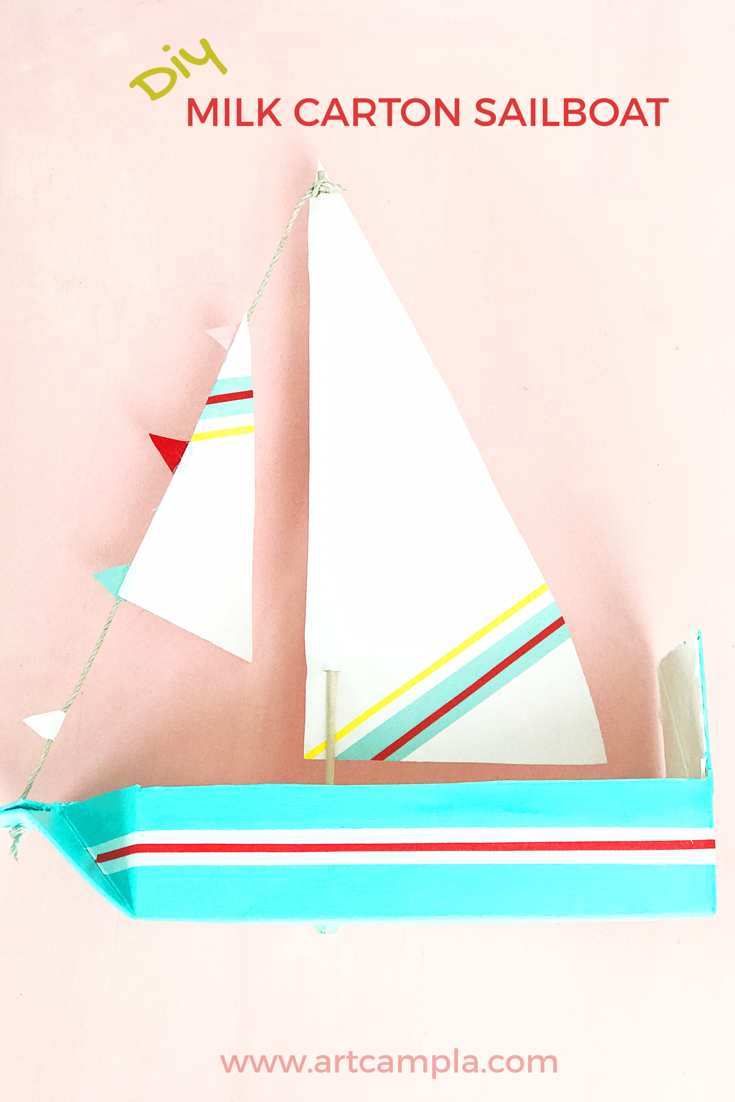
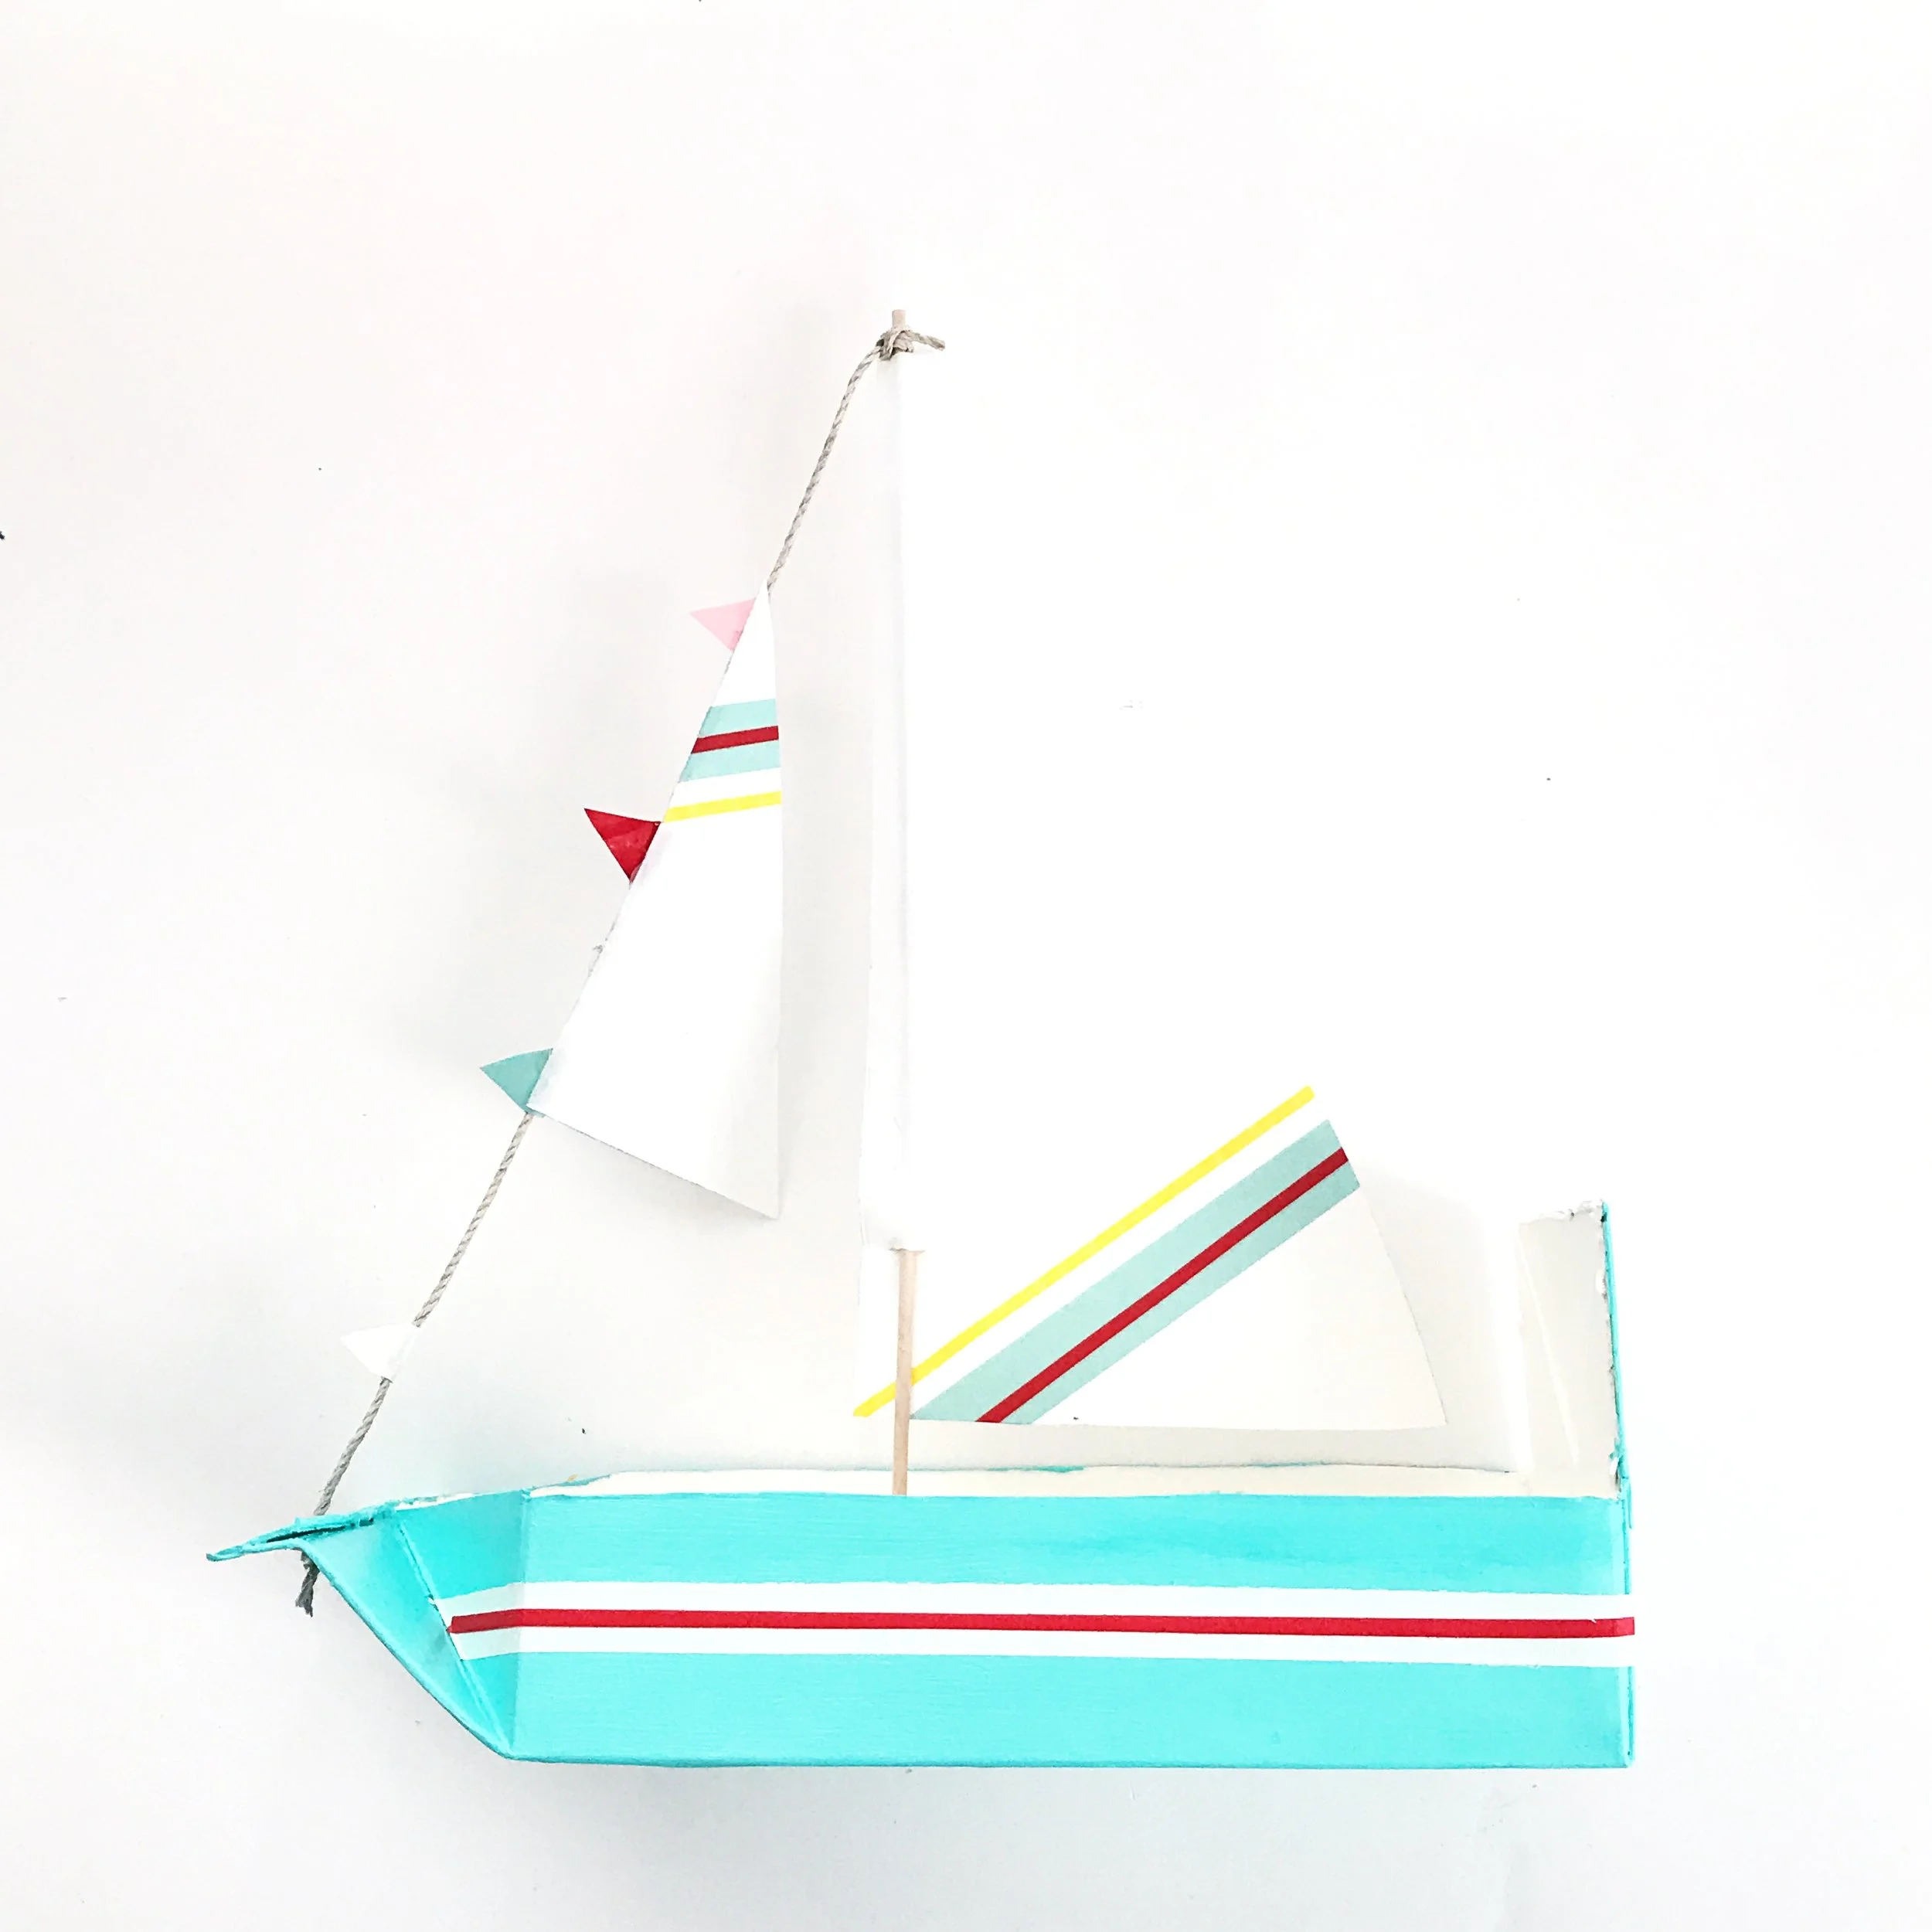
Milk Carton Sailboat

I am not afraid of storms, for I am learning how to sail my ship.
-Louisa May Alcott

Materials:
milk or juice cardboard carton
white freezer paper
masking tape - medium
drafting tape - skinny
thin rope cord
acrylic paint
foam brush
skinny paint brush
scissors
utility knife
pencil
permanent marker
skinny wooden dowel
hot glue gun
1. Use a ruler to draw a dividing line down the center of your carton.

2. Carefully cut along the dividing line with a utility knife and scissors. Leave the entire bottom section attached to half of your carton.

3. Paint your boat with acrylic craft paint.

4. Decide where you want to put your "mast" (your wooden dowel). Mark a small pencil dot above and below that center point and create a small entry point. We added a little hot glue around the dowel inside the boat and on the underside.

5. Once your acrylic paint has dried you can take your masking tape and add racing stripes to your sailboat! We started with a piece of medium white masking tape.

6. Then we added a thin red pin stripe on top of our thicker white stripe.

7. The girls wanted to add some flags to our rope, so we created them with washi tape. We simply folded the washi tape around our thin rope and cut the ends in a V shape.

8. Then we drew our mainsail (the big one) and our jib (the little one) on a piece of white freezer paper. We have big plans to race our boat so we wanted a paper that was somewhat coated and water proof.

9. Time to add some pizzazz to the sails! We used washi and thin masking tape. Notice that we applied them to our drawings before we cut them out.

10. Carefully cut out your sails with a sharp pair of scissors.

11. Create two small entry points on your mainsail... one near the bottom and one near the top. You will push your dowel over the bottom of the sail and through and then come back out when you reach the opening at the top. We then secured the dowel to the sail with a dab of hot glue on the back side.

12. Create a small hole at the front center of your boat (on the pour spout of the carton). Tie your rope w/flags to the top of the mast and then come down through the pour spout hole. You will tie a knit below the spout to firmly attach your rope. You can add a dab of glue here if necessary. Add a thin line of hot glue along your rope and attach the jib (small sail). Apply pressure with your hand for a few seconds while the glue sets.
Umm... I don't think it gets any better than that! Time to hit the open sea.