
Process Art Play Tiles Inspired by Ray Eames

choose your corner, pick away at it intensely and to the best of your ability and that way you might change the world.
- ray eames
I am so happy to be welcoming my wonderful friend; the supremely talented Amanda of barley & birch to the blog. When Amanda and I first discovered one another on Instagram years ago we quickly realized we had a long list of things in common. One of those things was a deep appreciation for mid century modern architecture and design. Amanda inherited the MCM gene from her uncle who is an architect and I inherited it from my mom’s side. My grandfather was a mid-century modern architect who was part of the second wave that followed the pioneering “Harvard 5.” My grandmother was his design partner who helped design and stage his interiors. Together they opened a contemporary furniture store called “Design Collaborative.” My mom often refers to them as the New Canaan, CT. Charles and Ray. All this to say, when I wrote Ray’s name on the artist feature list I knew exactly who to pair her with and as luck would have it, Amanda was as excited about this plan as I was.
Amanda is one of those people who is just ridiculously talented and good at a lot of things. From art world curation and content creation to stop motion animation and illustration to complete design rebrands and miniature modern house builds.. she does it all with her signature style and a generous heart. Pictured below are some of our favorite print and play designs that Amanda sells in the b&b shop. You will notice that this lady has a knack for combining good design X a love of play (much like Ray!)
Without further ado, I will let A take it from here..

A collection of our favorite printables + play projects designed by Amanda for her site: barley & birch
My first introduction to the work of Ray Eames was snuggling up in my uncle’s Eames Lounge Chair - tucked up in a big cozy blanket to listen to a story or read a picture book. I didn’t know it at the time, but by age 4, that Eames form + function approach was already making an impression. In college, I discovered a deeper connection to Ray’s art and processes while studying architecture and graphic design. Throughout my many years of freelancing, I’ve often gone back to reference a specific Arts + Architecture Magazine cover, the details of a toy project, or photo of her office space to gather inspiration. And most recently while working on barley & birch projects, I’ve turned to her principles to help me work my way through the creation of a functional art project. For so many reasons, Ray’s work has always felt like home to me, and I’m so excited at this opportunity to celebrate her all on her own!
Many of Ray’s most famous projects are the result of collaboration with her husband Charles - you might recognize the Eames chair, the Eames elephant, or their House of Cards. But Ray’s own work was so incredibly extensive, diverse, and boundary-pushing. From abstract art and graphic design, to textiles, toy builds, furniture design, and film-making - she did it ALL, and every project led to a new discovery or process to be thoroughly investigated. At home and in their imagination-expanding office, she kept amazing collections of intricately-crafted folk art objects, tables of toys, groupings of small souvenirs, and collected items from nature on display. The charm of her many interests comes through in the whimsy of her work and delight in her palettes and patterns.
Inspired by the recurring shapes and themes found in her art, her desire to explore every possibility, and the playfulness and excitement in learning that permeates her work, I sat down to play with some simple materials and some of her guiding concepts. These transparent process art play art tiles are a combination of some of my VERY favorite Ray Eames foundations, and encourage learning through experimentation and variation. My hope for these it that they inspire curiosity, risk-taking, and endless exploration. They’re a fantastic art tool you can reuse over and over, take with you for on-the-go art entertainment, or pull out for instant collaging without the need for supplies or cleanup!

Process Art Play Tiles Inspired by Ray Eames
contributed by: barley & birch
MATERIALS:
3-5 Transparency sheets, self-sealing lamination sheets, or cut squares from plastic packaging
Collaging supplies like paper scraps, magazine clippings, tissue paper, washi tape, or stickers
Mark-making supplies like paints and a paintbrush/stamps. paint daubers, or a roller
Optional:
Metal brads or tape
A Hinged binder ring, folder, or small box for storage/travel
** Please note that we participate in the Amazon Affiliate program. This means if you purchase any of the products linked here we will receive a tiny sales commission at no additional cost to you. We only link to products we use and love. Your support helps us keep this site running - thank you!
INSTRUCTIONS:
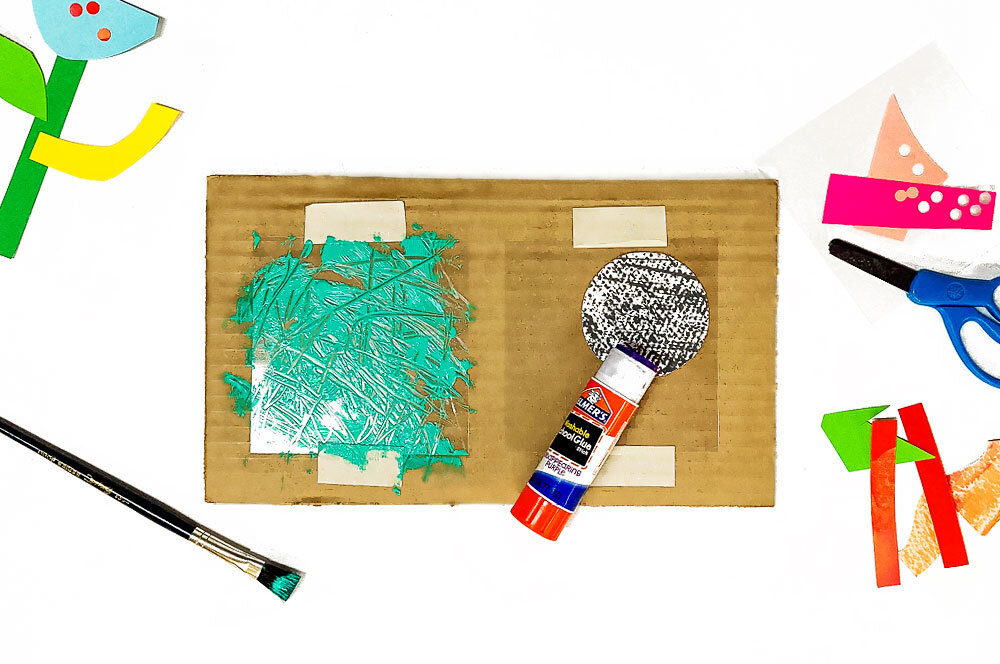
Cut 3-5 transparency sheets into squares and/or rectangles. We cut a set of small squares and another set of larger squares. You may want to tape each transparency square to a piece of cardboard or smooth work surface - this will keep the squares in place so they don’t slip around as little hands are working on them.
*Note: If you’ve cut squares from plastic packaging, you may want to use a piece of medium-fine grit sandpaper to smooth any sharp edges.
Gather a selection of collaging and mark-making supplies to lay out as a process art invitation. Beautifully textured or patterned colorful papers are a wonderful supply. I used an assortment of pre-cut shapes, torn scrap pieces, acrylic paints, office supply stickers, and painted papers. You could also add magazine clippings (plant foliage, objects, colorful textures!) newspaper, or washi tape. Permanent markers also work well on the transparency squares and are a way to add some semi-transparent color.

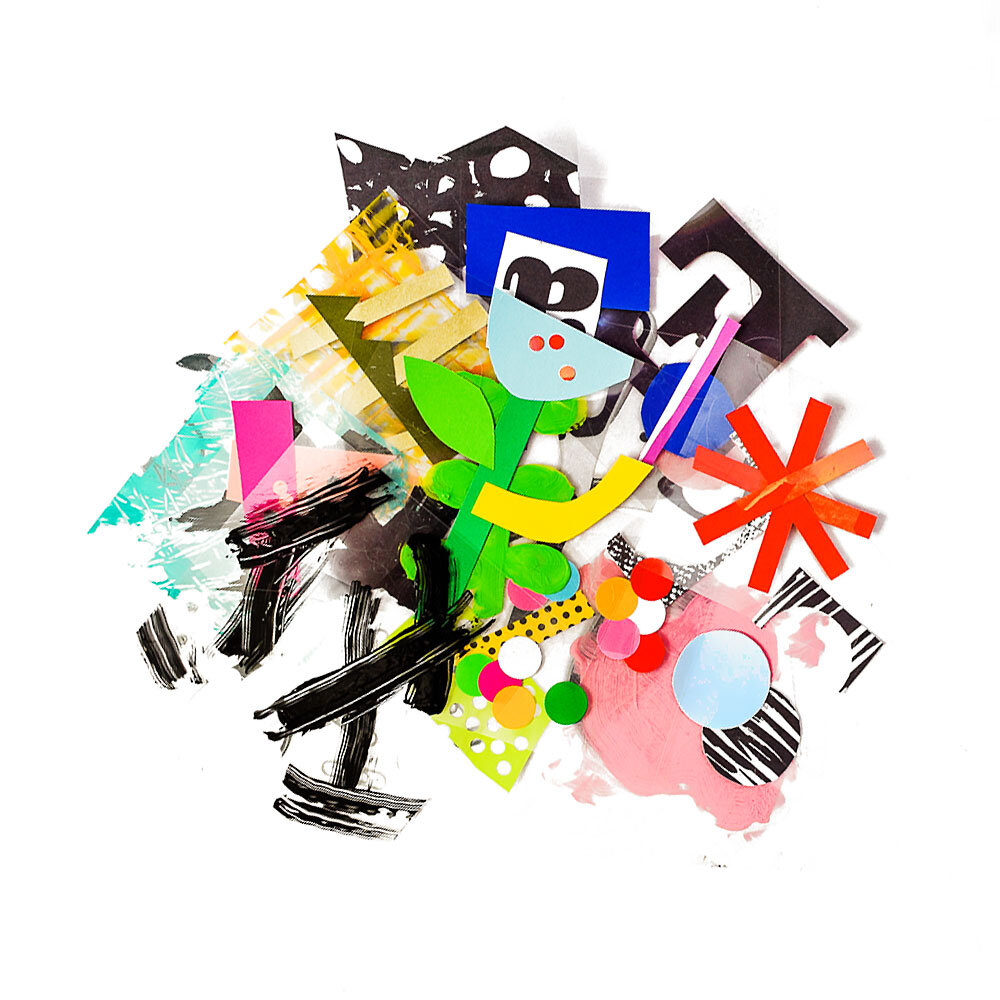
Cut, rip, stamp, paint, splatter and create! You can glue organic shapes made of cut or torn paper on to your transparency squares, use a paintbrush to make colorful lines, circles or squiggles. Experiment with stamping or scratching out textures and patterns, or even trace outlines and draw with permanent markers. Add words or your initials using cut out letters, stickers, or a stencil.
Some kids may dig right into the supplies and start exploring, while others may want a bit of direction to help them get started. You can use the themes in Ray Eames’ own work for inspiration. Paper dolls, spinning tops, kites, treasured toy collections, hearts, butterflies, travel, nature - so many great options! Take some time to observe Ray’s works - how do you think she made the marks in her paintings? What kinds of shapes did she repeat in her work? Do you have a favorite object, place, or animal you can take inspiration from?

Watch a video clip of the process here
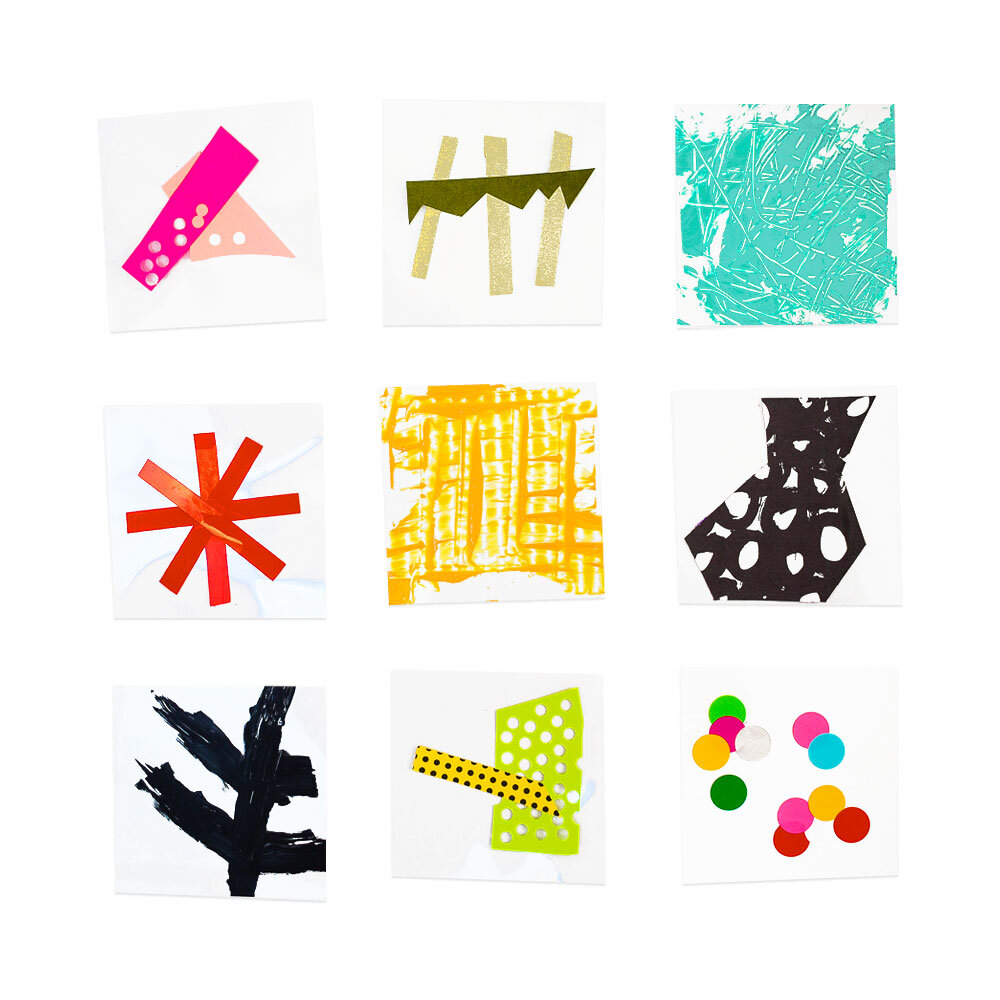
Once you’ve finished creating a variety of play tiles to work with, let your transparency sheet squares dry completely, then PLAY! There are SO many ways to get creative with how you use these to explore composition, collaging, color, and more…
A FEW WAYS TO USE YOUR PLAY TILES:
Layer over a piece of colorful construction paper, painted cardboard, or existing artwork. We laid out a variety of backgrounds, then experimented with layering our tiles over top, moving to find compositions we liked. Love the compositions you’re finding? Take pictures of your favorites to save and share!

Make your collages kinetic by affixing one side of a play tile on to your collage with clear tape. Or use a hole punch to make a hole in your play tile and affix to your collage with a metal brad. Now you can flip or twist your play tiles, moving them around to create an ever-changing composition.
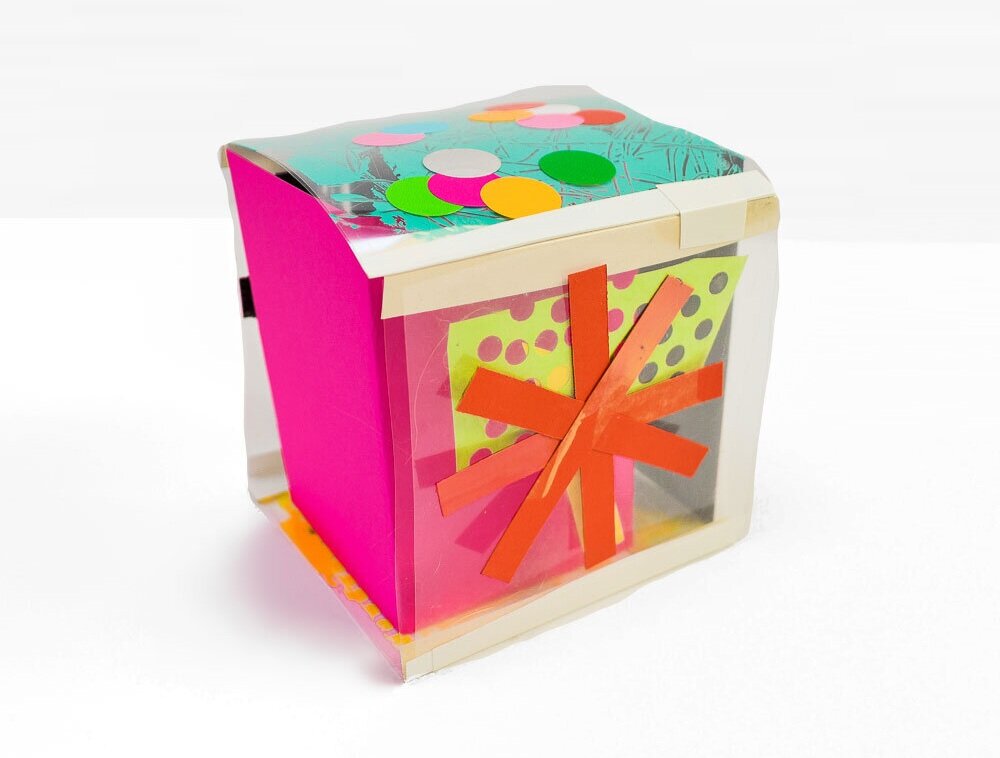
Tape 4 squares end-to-end, fold into an open cube and tape. (if you used thin transparency sheets as I did, double-stack your squares to give them some stiffness so the cube keeps its shape). We folded a piece of paper into an L-Shape to support our cube - how many ways can you think of to support your own? You can make more cubes for stacking, or create simple standing structures by combining with folded paper. Twist and turn your cube to make observations, shine a flashlight from different sides - do the colors or shadows change? How do the shapes look different?
Use masking tape, electrical tape or similar to make a connected grid of your squares that you can hang in a window or in front of a light. What shadows are created by the shapes and marks on your grid? How does your grid change what you see through the window?
Use your tiles along with a variety of nature finds or loose parts for open-ended art and play that *doesn’t* require getting out ALL of the supplies and starting from scratch.

I hope you have so much fun exploring the possibilities of your own play tiles! I’ve made our own set into a little booklet of play tile swatches by punching a hole in the corner of each and threading onto a hinged binder ring - just the ticket for impromptu art investigation!

With a passion for cultivating imagination, Amanda aims to help families discover their creative potential and be inspired to make the world a better place through art, play, adventure, activism, conservancy, and community.
When not tinkering with ideas, designs, and projects for barley & birch, Amanda enjoys working as a freelance graphic designer and modern art curator.
follow barley & birch on: instagram | facebook | Pinterest
If you loved this Ray Eames style play tile project you can head over to Barley& Birch and check out Amanda’s: Ava Hesse’s Yarn Mobile project and her Kinetic Paper Shape Art project inspired by Sophie Taeuber-Arp.


