
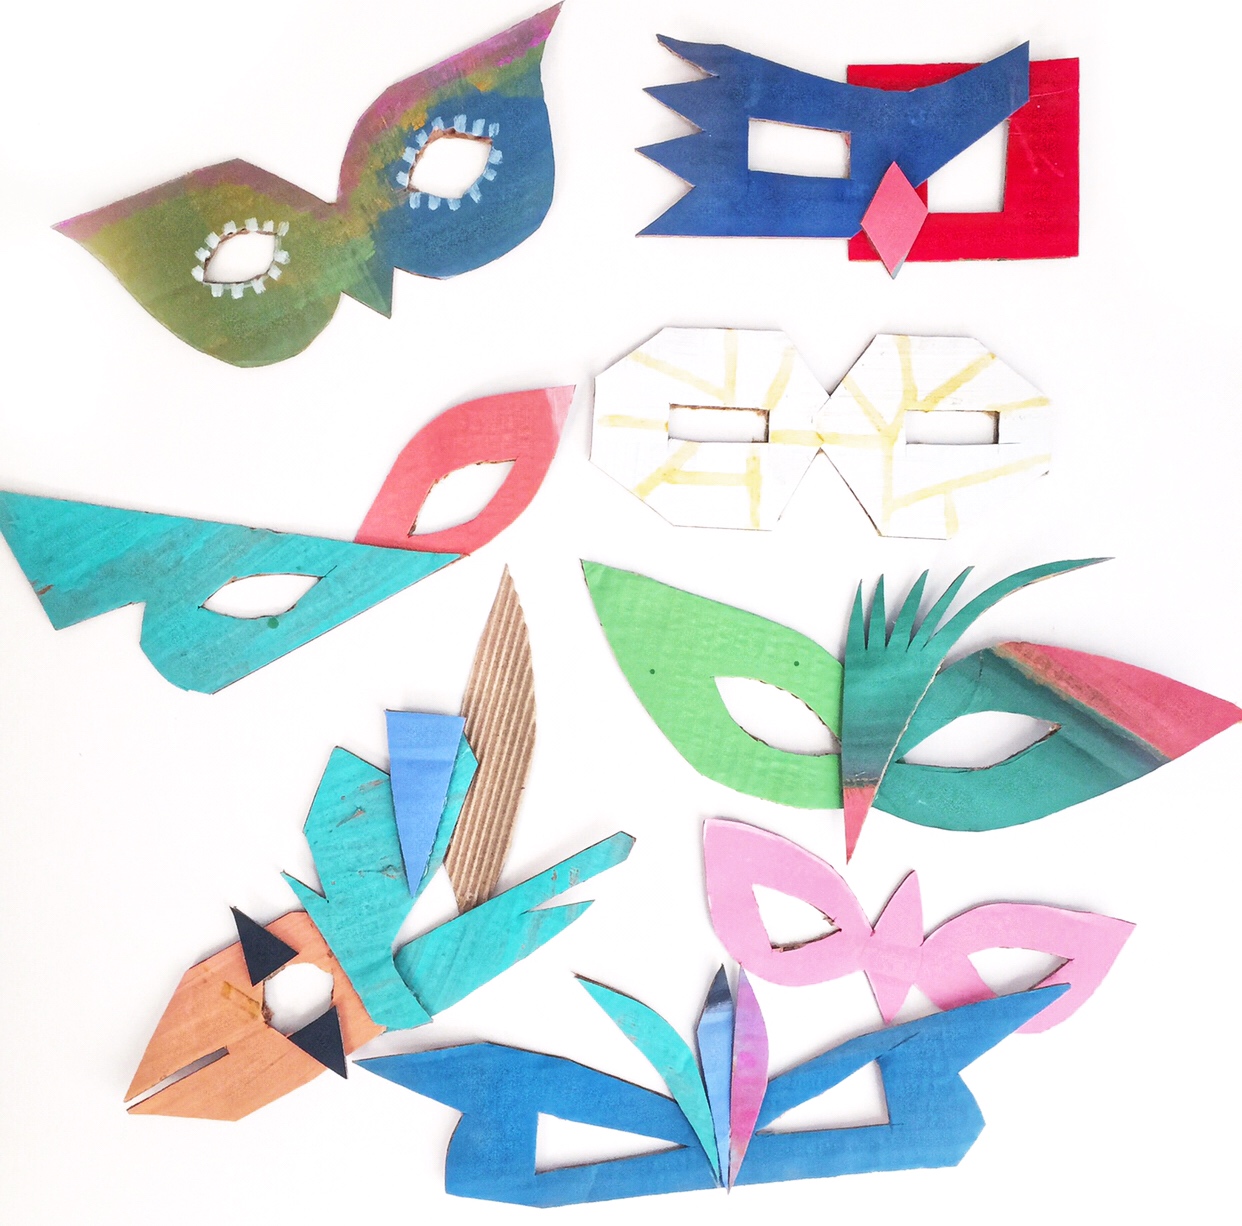
Cardboard Masks

Laissez le bon temps rouler!
(let the good times roll!)
Art Buffet
noun
1. A glorious, colorful, textural array of materials laid out on a table from which artists may serve themselves.
2. An abundant spread of colorful bits and bobs that makes you want to dive in and make… a lot of stuff
3. A no-limit, serve yourself, all-you-can-ART feast
A Cardboard Mask Making Station is one of our very favorite ART CAMP “buffet” style art invitations to set up at our workshops.
Materials:
painted cardboard scraps
mask templates (see form below)
dazzling bits and bobs: pom poms, sequins, foil tissue paper, beads...
wooden dowels and/or hole punch and elastic
low temp glue gun and/or double sided sticky tape, glue stick, class glue, glue dots
scissors
cardboard tool of choice; utility knife , cardboard knife, cardboard scissors (please use common sense and take safety precautions when using these tools or introducing them to older students)
*this post contains affiliate links. This means if you make a purchase using the link we provide in this post we will receive a teeny tiny commission at no additional cost to you. We only link to materials and products we use and love. Thank you for your support!
Grab your painted cardboard scraps, pom poms, confetti, tissue paper, ribbon and any other dazzling bits and bobs that you have on hand and let's get this party started.
Arrange all of your beautiful mask making materials in the center of your table along with scissors, glue sticks, mask templates, and skinny wooden dowels and/or elastic thread.

Hot glue is ideal when you are working with cardboard because it bonds quickly, so you don't have to worry about dry time when you are building your masks. Both of my girls were using low-temp glue guns by the time they were 6. That being said, if you are working with younger kiddos you can use school glue, glue sticks, glue dots, or double-sided sticky tape to build your masks... or set up an adult run hot-glue assembly station!
If you are working with little ones it will be easier to have your cardboard shapes pre-cut so they can just decorate and assemble. Or just give them the mask printable as a base and have them add their shapes to the mask form. Kids age 8+ should be able to handle the cardboard cutting with minimal assistance. I had to help my girls cut out their eye holes with a utility knife, but other than that they worked independently.
You can also modify this project by swapping the cardboard for card stock which is an easier material to cut.


After the cardboard pieces have been glued together, it is time to add finishing touches with beads, pom poms, paint markers, and fringe:
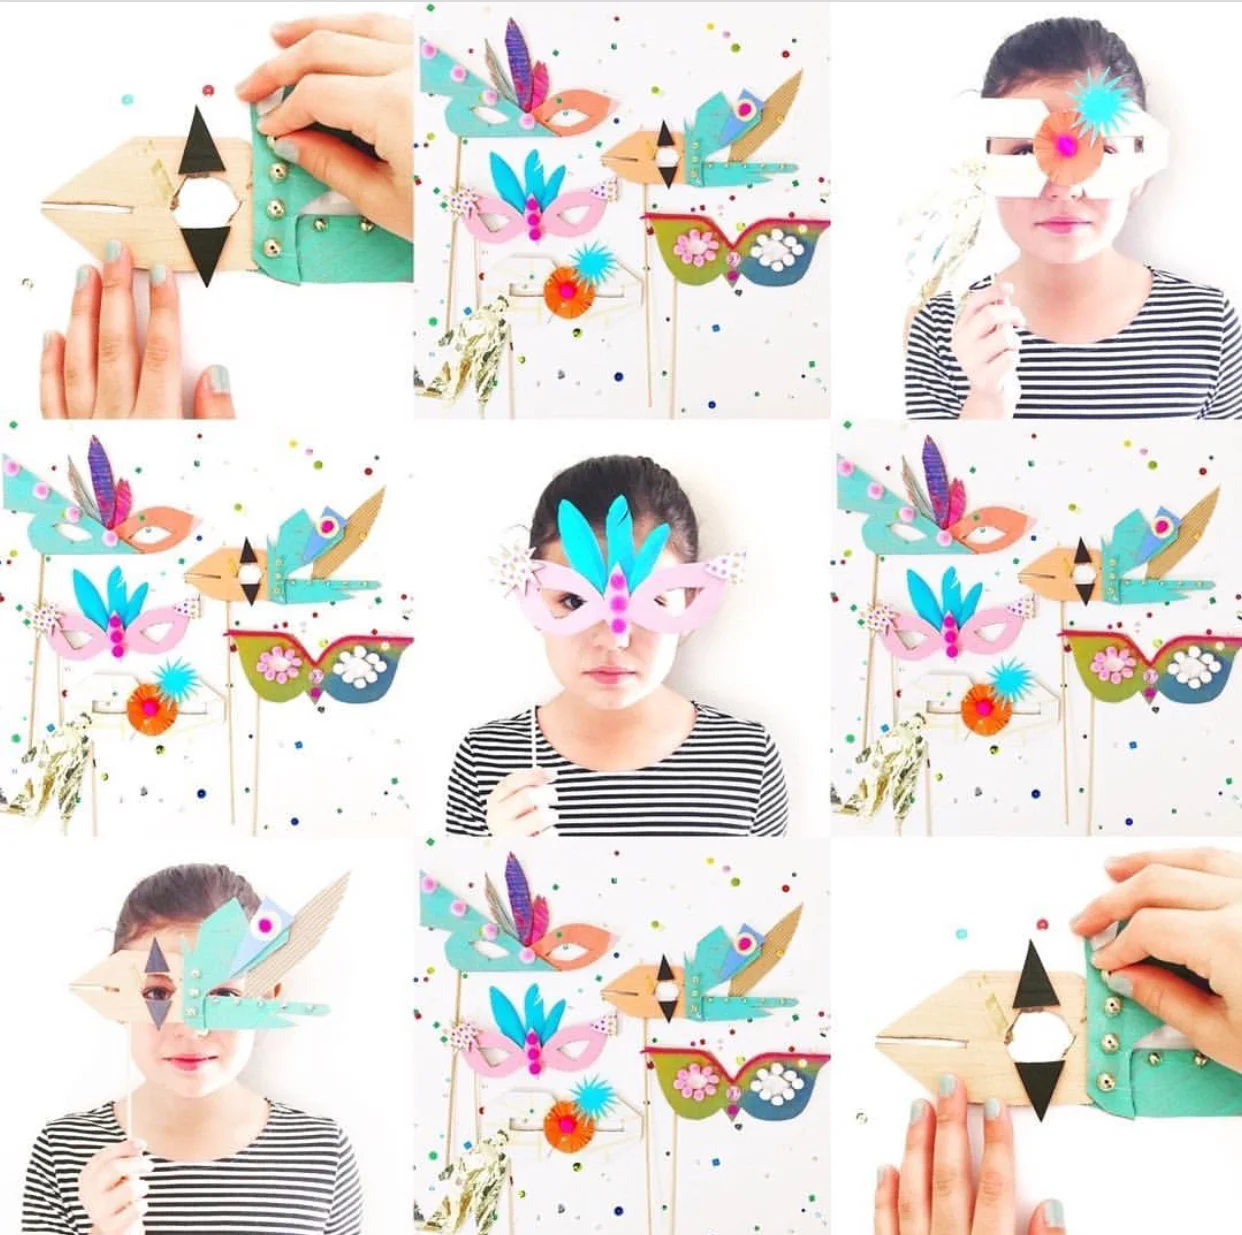
We liked the idea of a half mask on a stick, but you could also punch little holes on the edge of your mask and string elastic through. These masks are truly works of art. When you aren't playing dress up, hang them on a wall or mount them in a little shadow box!


