Class Art Project - Painted Dot Serving Tray!
Art is a line around your thoughts.
- Gustav Klimt
When I started brainstorming art auction ideas for H's first grade class, I knew I wanted the kids to create a functional piece of art. I had a hunch that making something beautiful that people could actually use might "sell well" and selling well is pretty key in the land of school fundraiser art. I toyed with the idea of a throw pillow or a vase, but I ultimately landed on a serving tray. A white serving tray is a lot like a blank canvas so I knew that whatever process we ended up exploring for the art making would look great on top of the tray.
Materials:
Liquid watercolor and diluted acrylic paint
Circle template
This post contains affiliate links, which means that we earn a small commission on the products that you buy using our links. Thank you for your support!
The art making for this project had to be: quick, fun, and colorful! Liquid watercolor and color diffusing paper definitely fit the criteria. Color diffusing paper is a lot like a thick, slightly rough coffee filter. In fact, I think you could probably achieve very similar results for your inky dots using coffee filters.

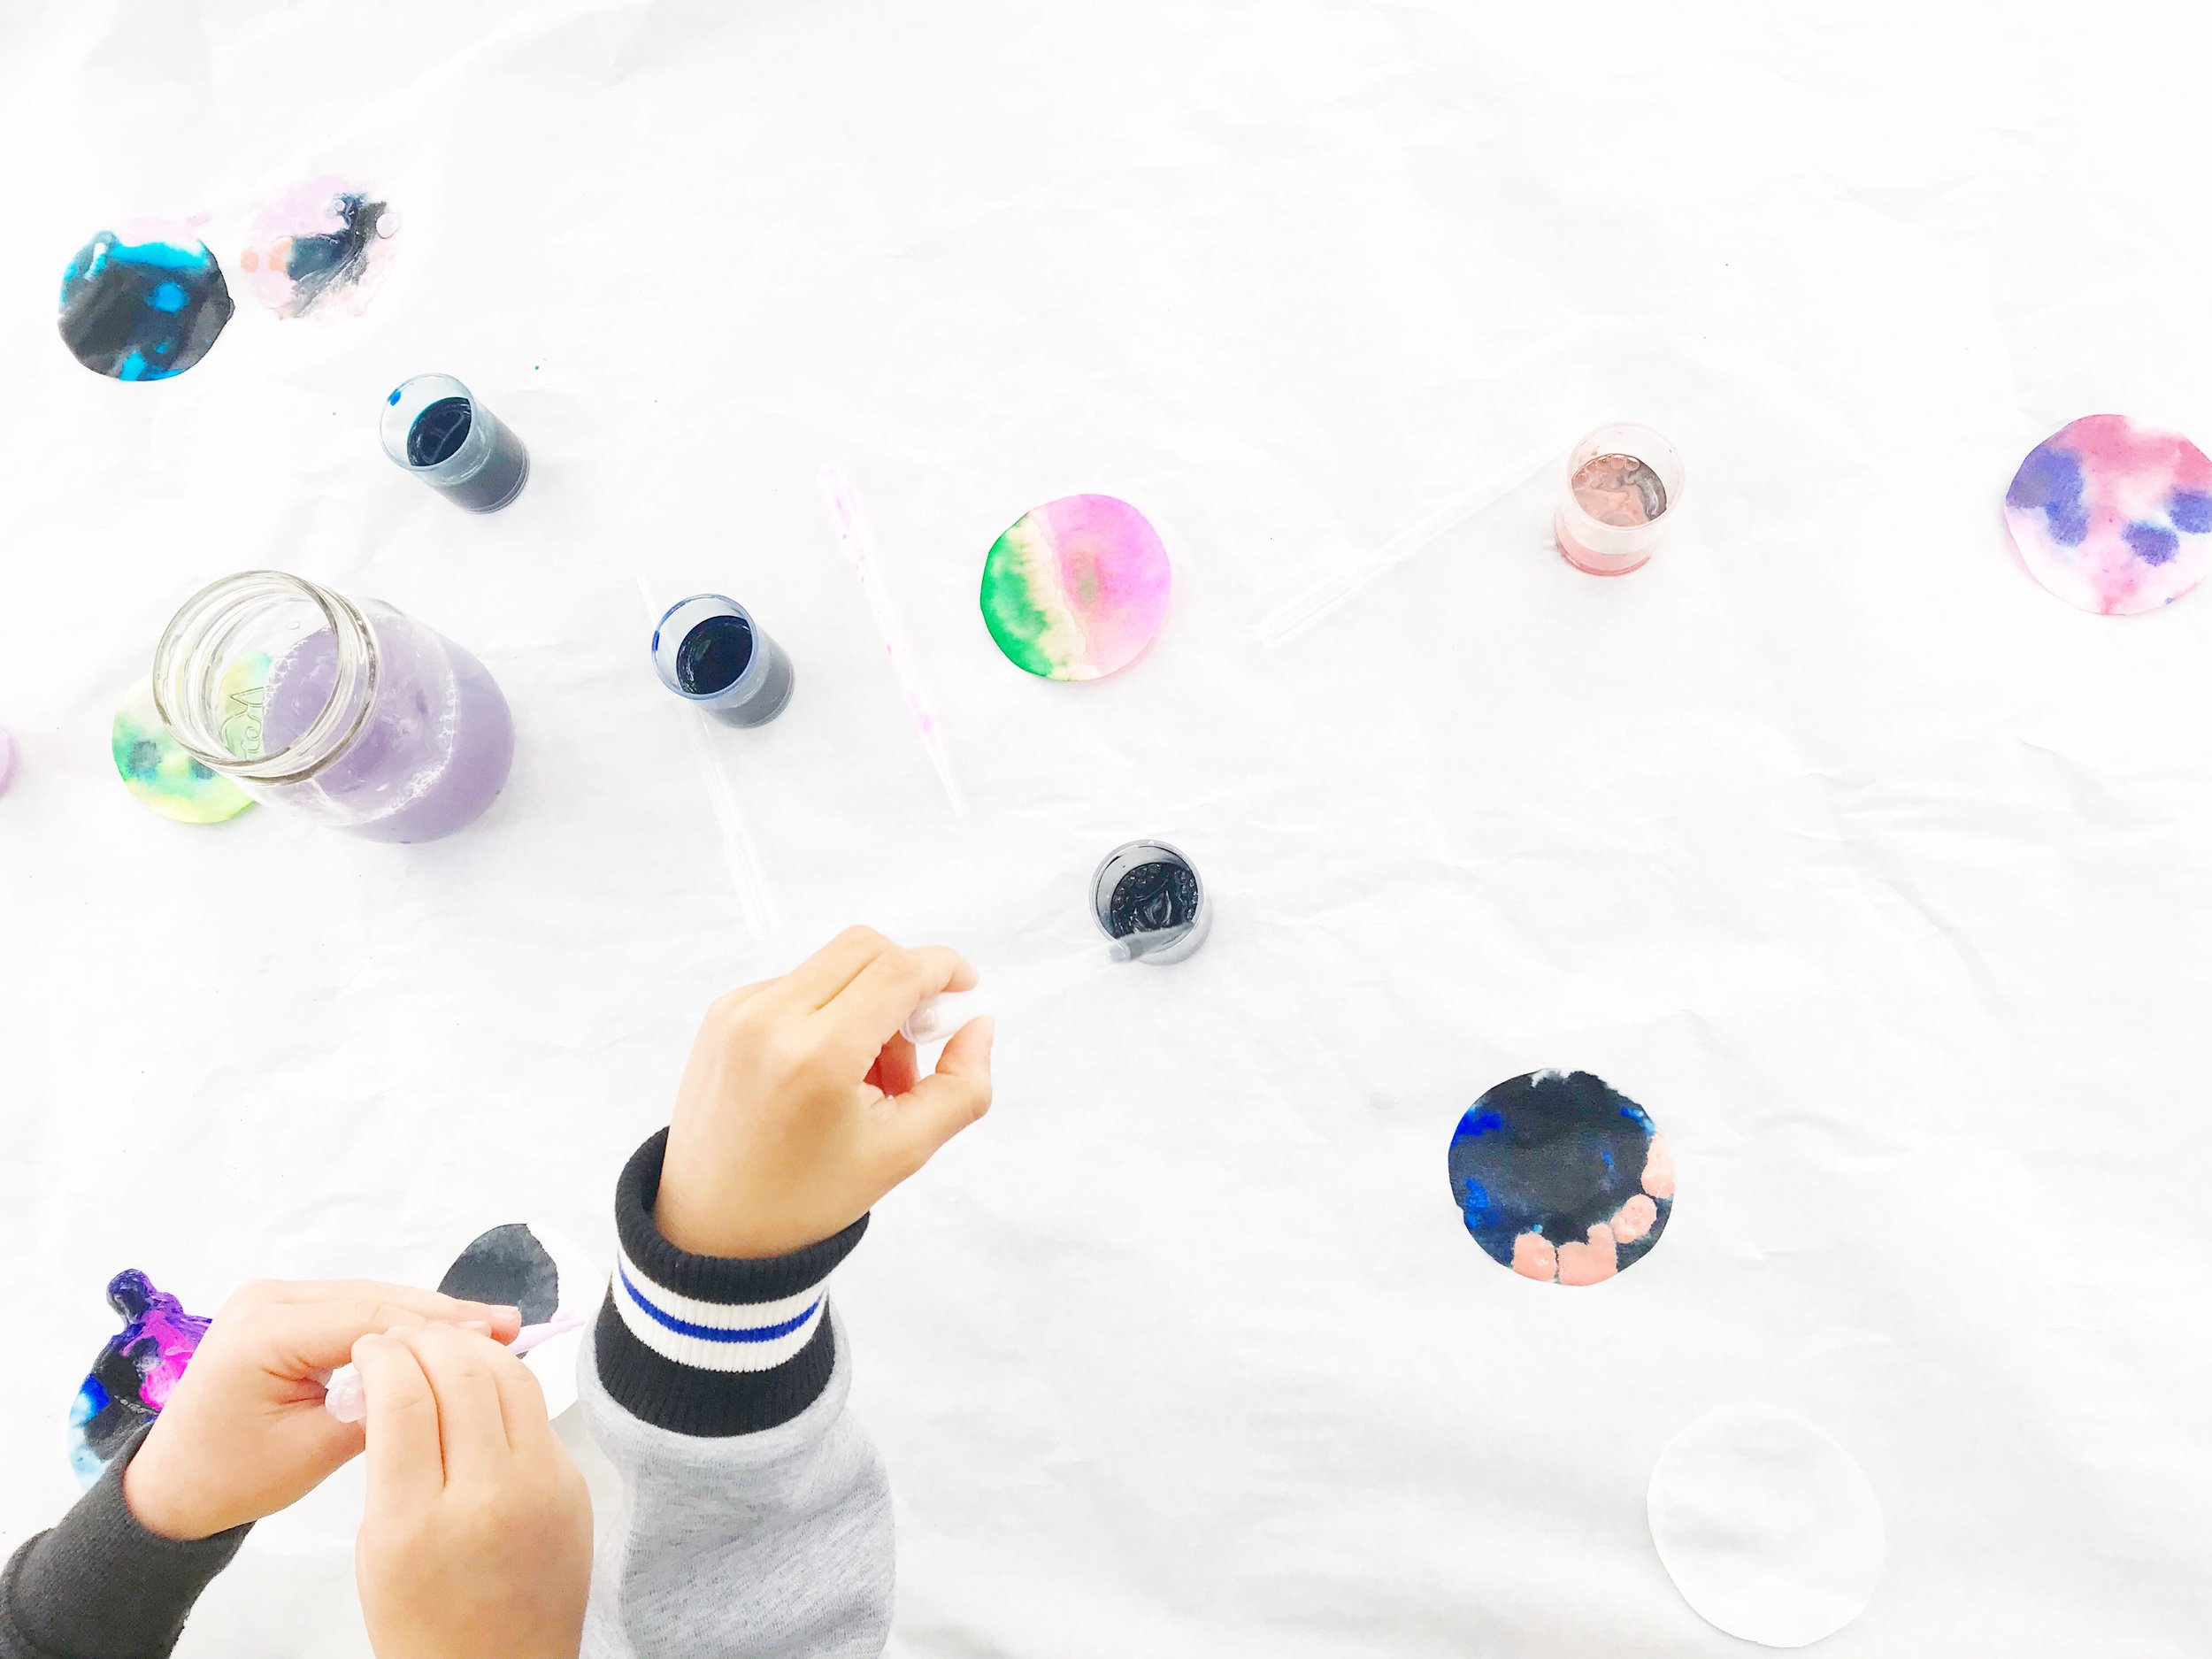
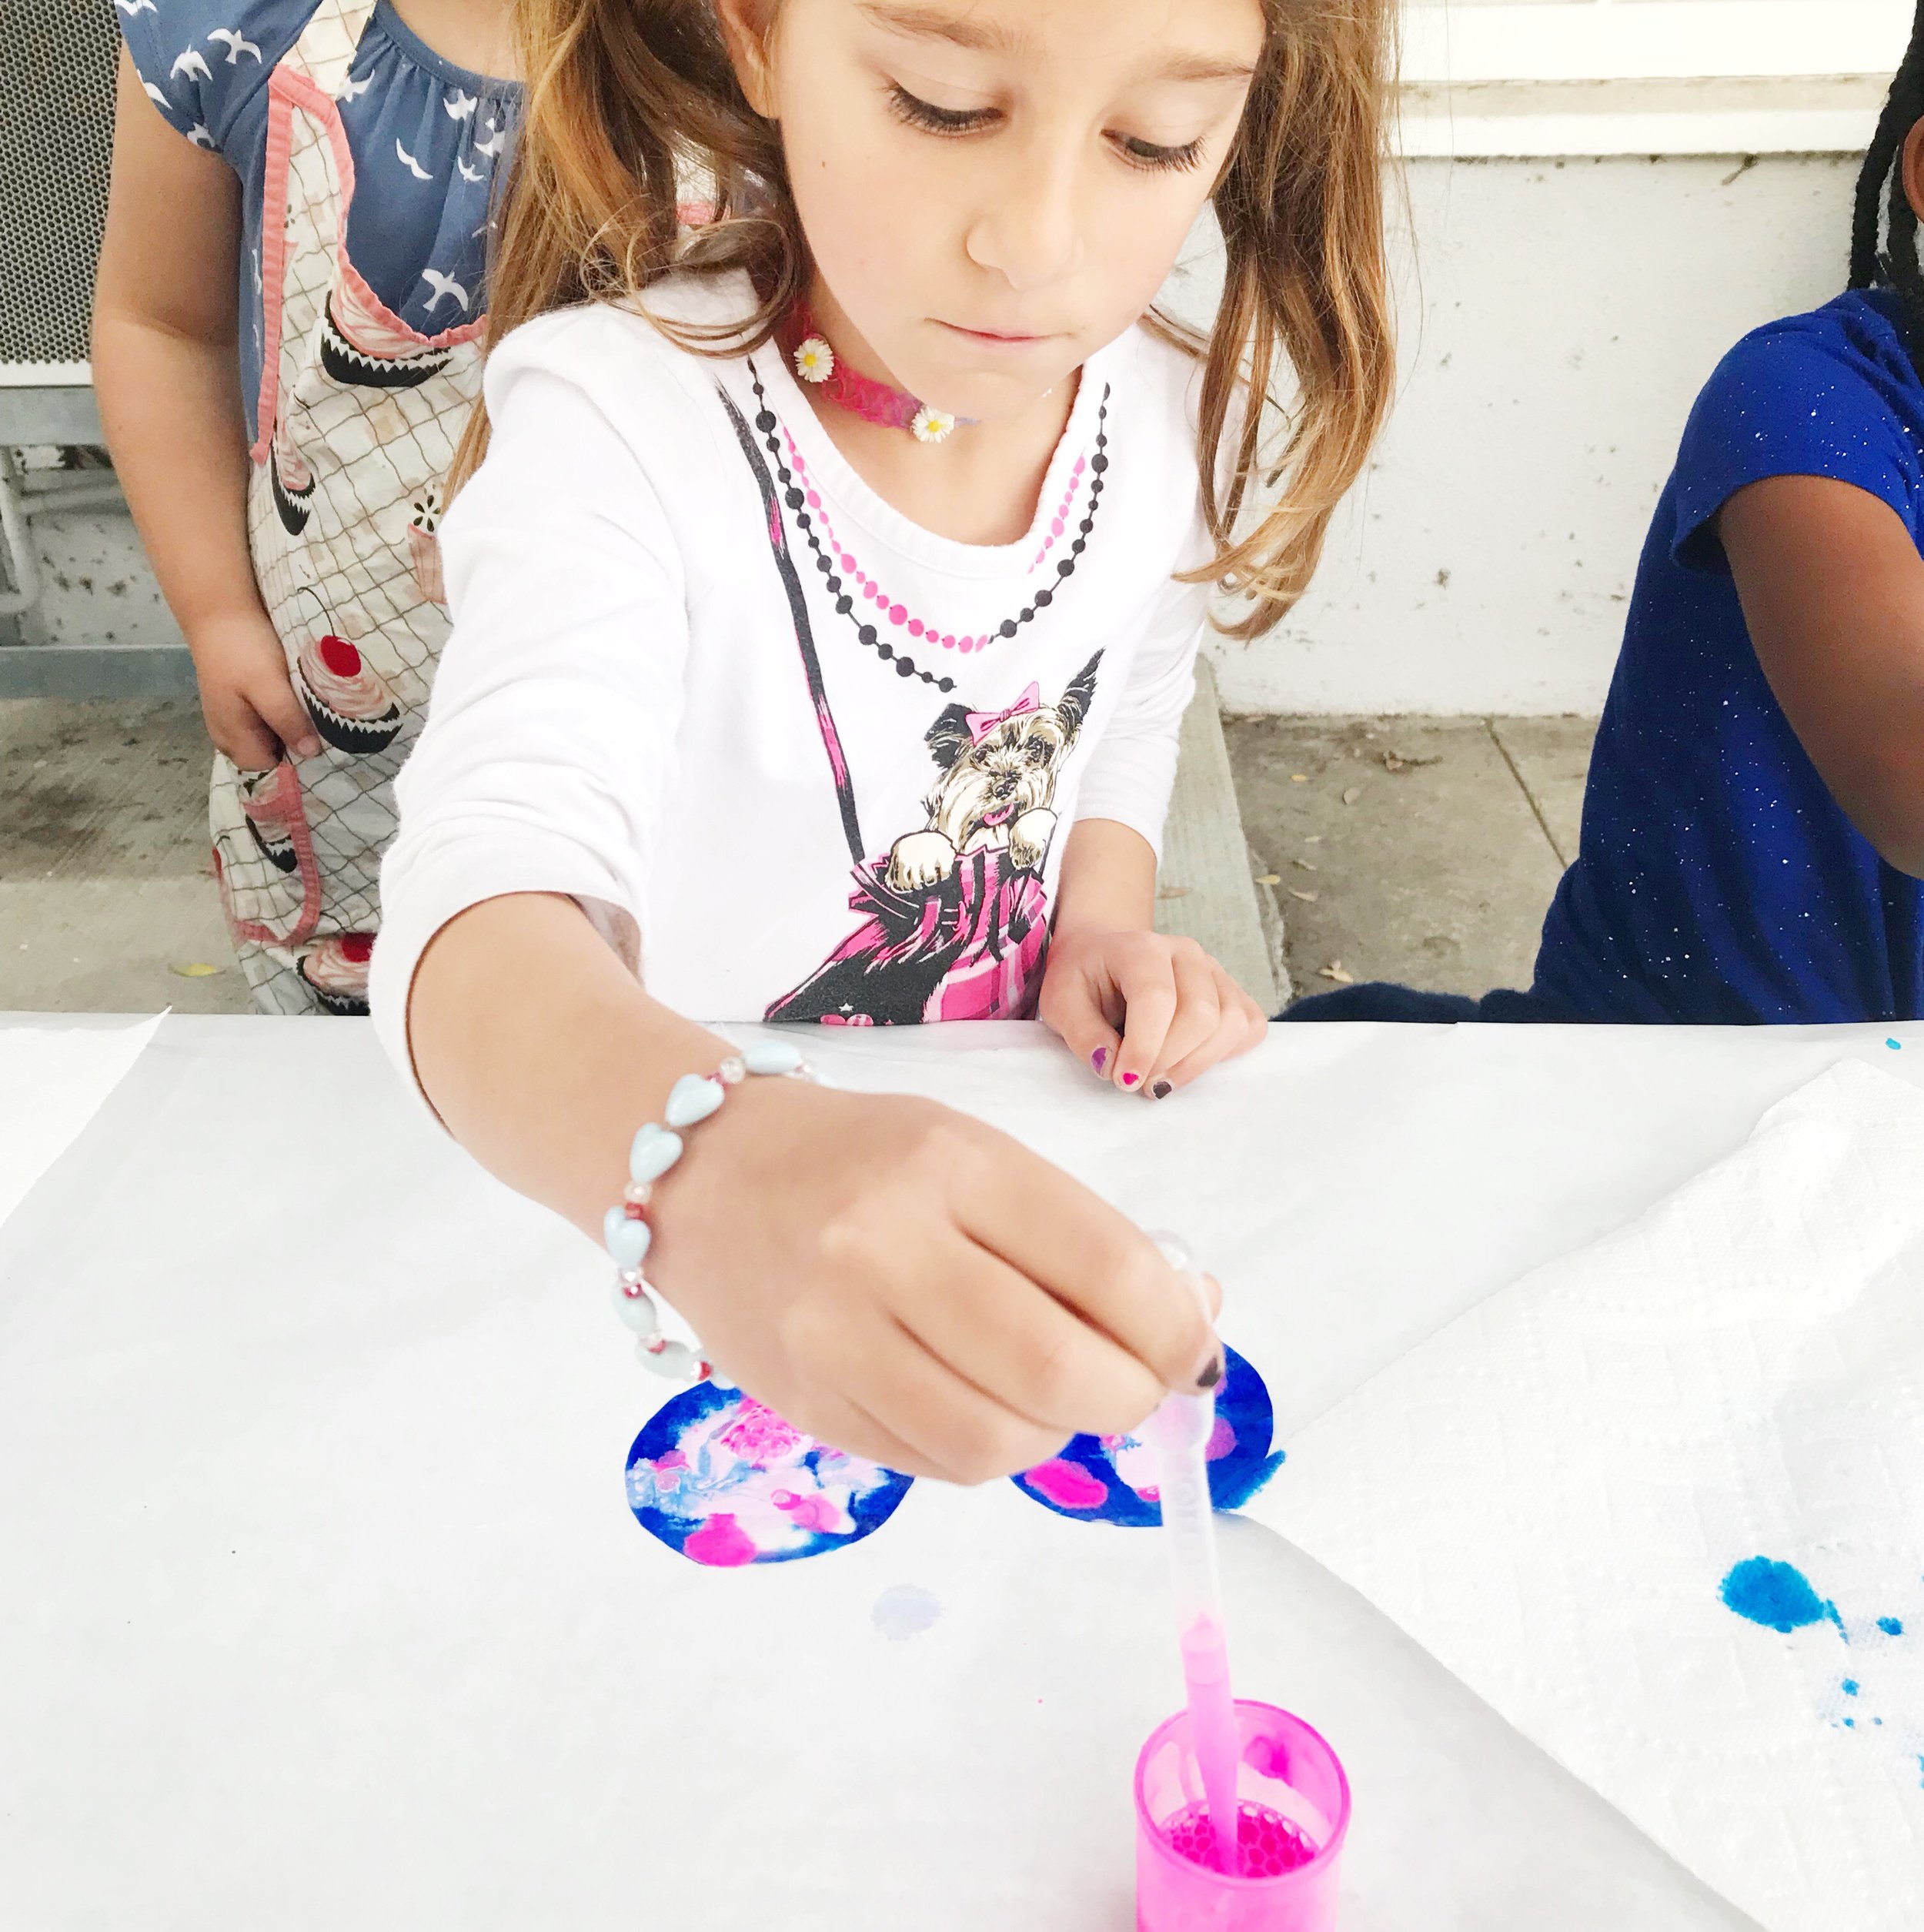
I broke the class into 5 groups of 5. Each group had about 8 minutes to work on their dots. I gave each student two dots to color.

I asked the artists to lightly mist their dots with a spray bottle before dropping color with their pipettes so that their colors would spread and blend in interesting ways. If you don't have pipettes you could totally use watercolor brushes but pipettes are really fun... the kiddos love using them.

I mixed up some diluted acrylic paint in addition to the liquid watercolor so that they could add some opaque splashes of color in addition to the watercolor. I think the variety definitely added interest. You can see the acrylic in action - it's the pink and peach splotches below.
The kids had SOOOOOO much fun with this process. They honestly did not want to stop. I think I will have to come back with liquid watercolor and pipettes so they can spend some more time with these materials.
Some things to consider: liquid watercolor stains hands... not permanently, but it is very pigmented so it takes a lot of scrubbing to get it off of hands. Consider using gloves for this activity. If gloves are not an option, have some vinegar, dish soap, and some scrubby pads (the kind that you would use on non-stick pans) for the kids to use at the hand washing station. If you are transporting these dots home wet, cover pieces of cardboard with wax paper so that the wet dots don't stick to the cardboard. Fluffy, absorbent paper towels are also a good item to have on hand. The kids got so color happy that puddles of paint started to soak through the craft paper I had used to cover the table, so we slipped some paper towels underneath the dots to absorb the excess paint.
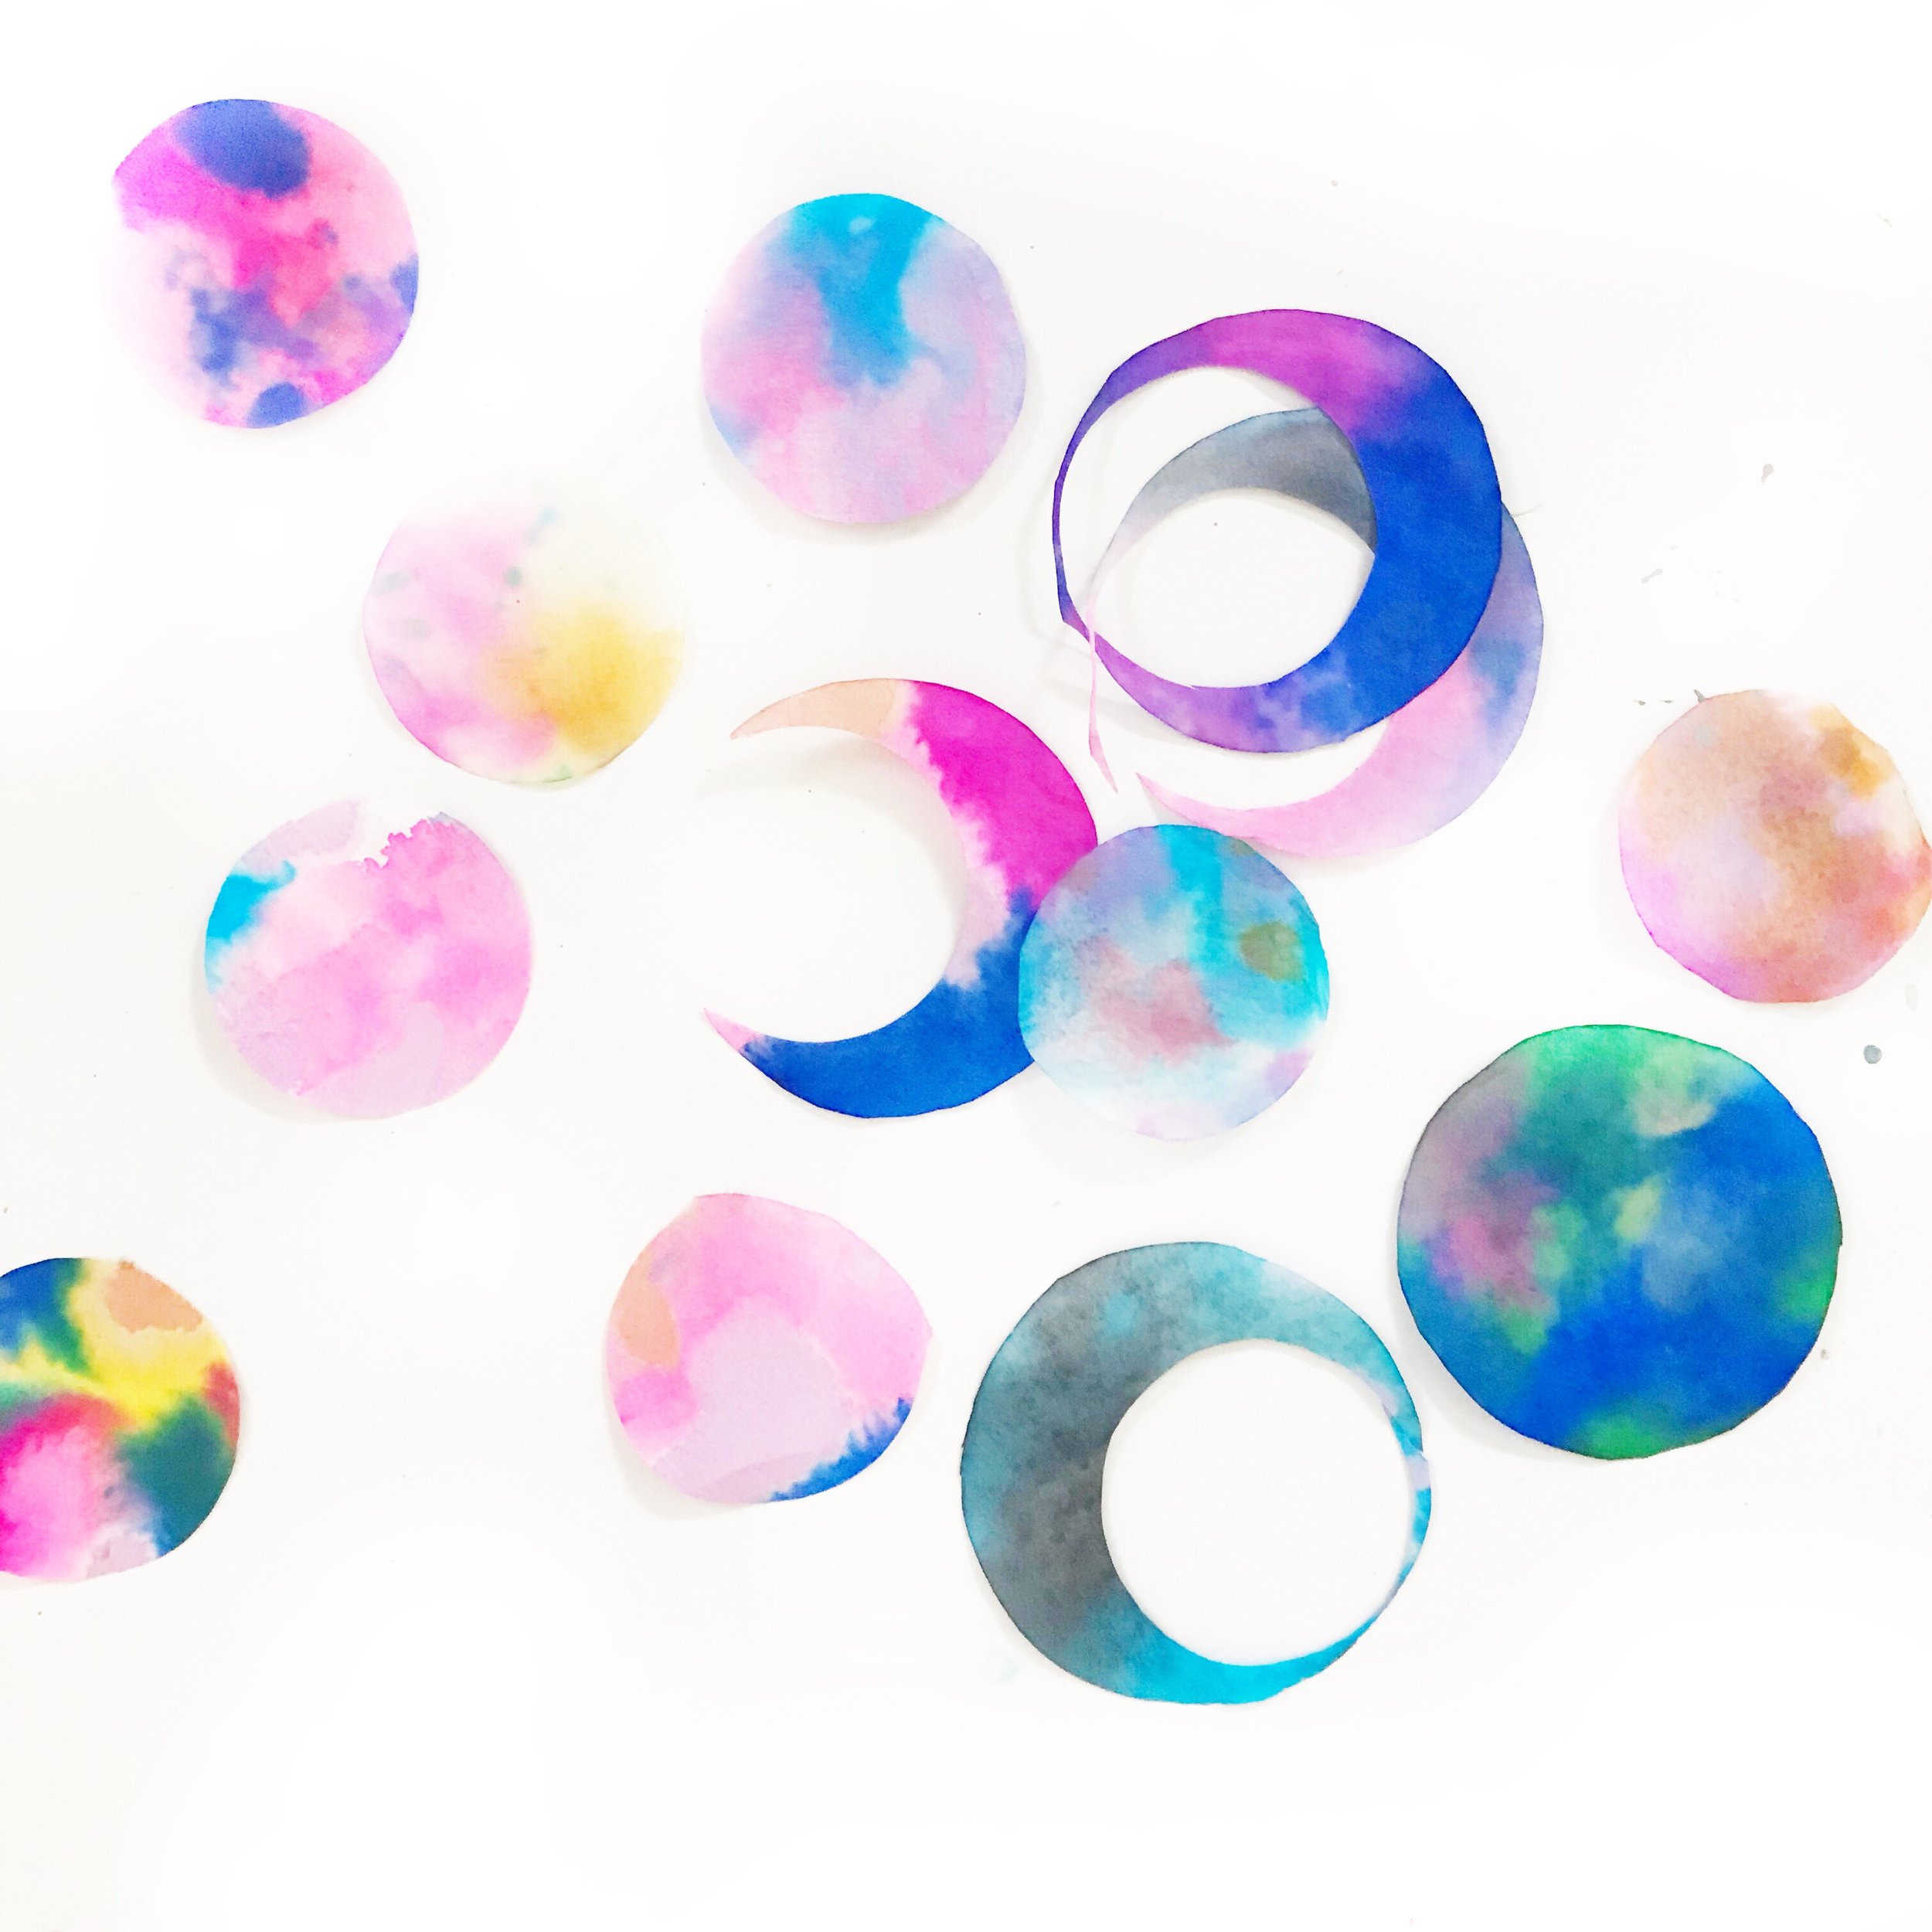
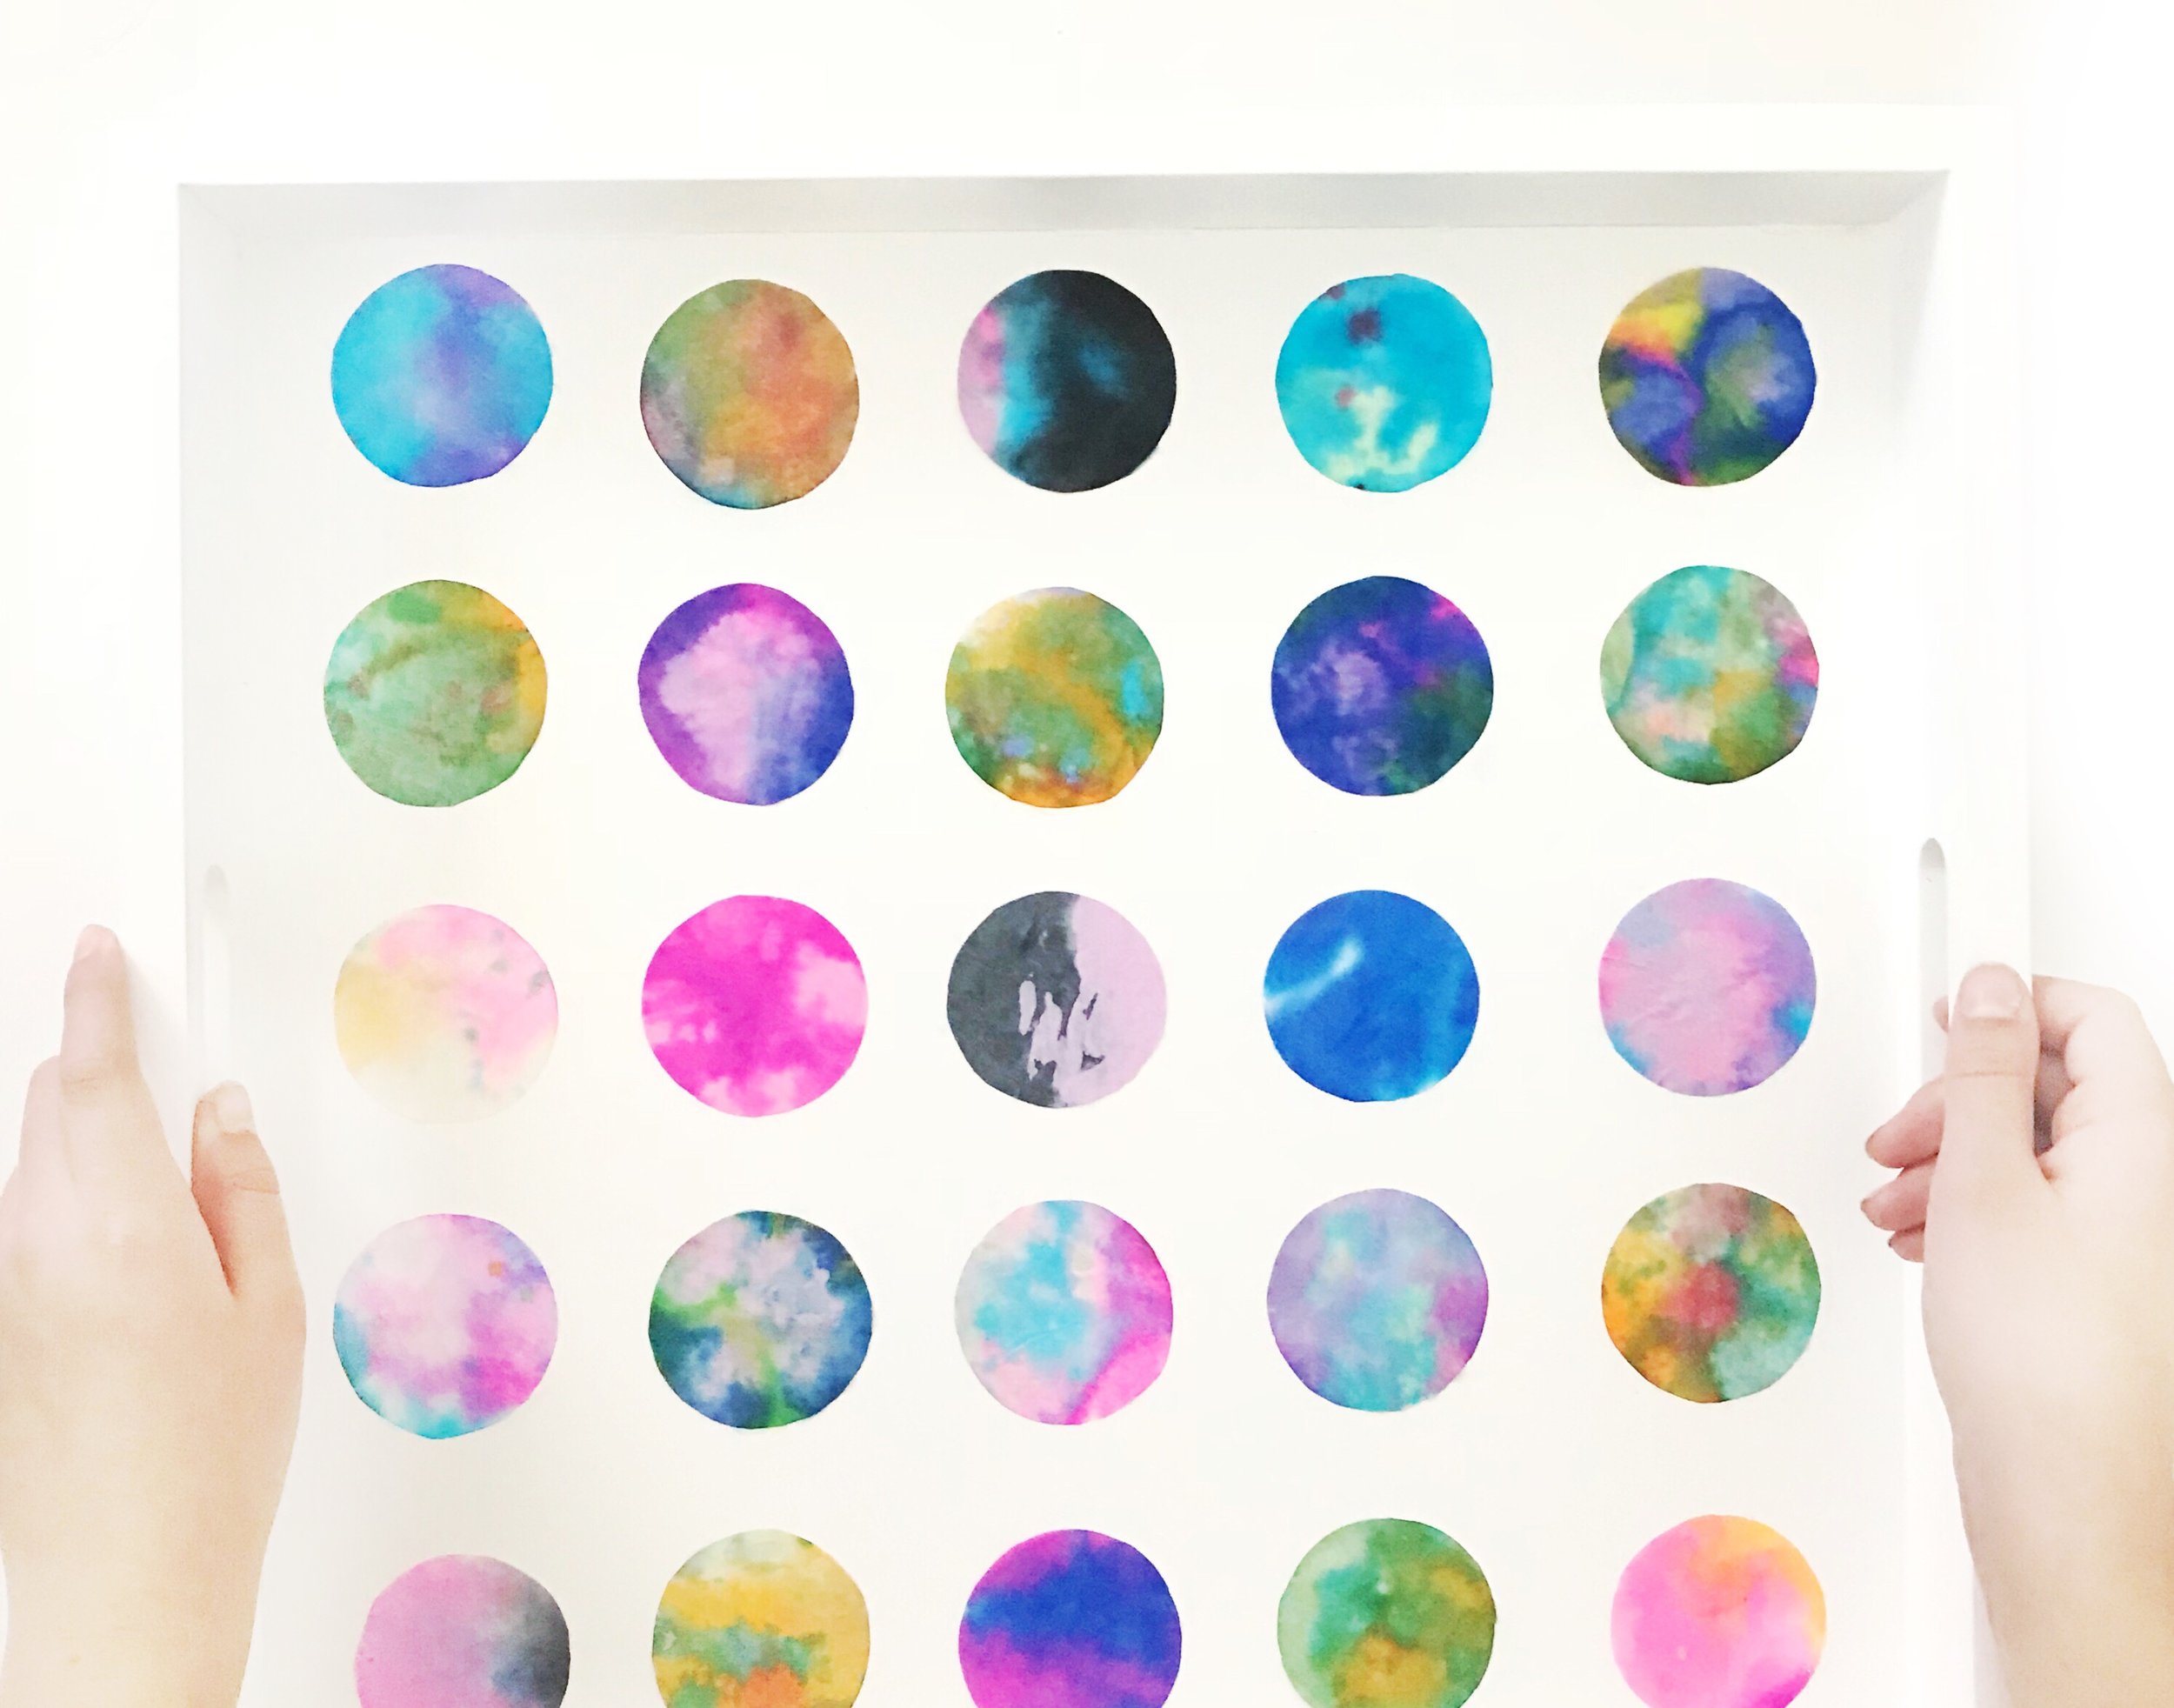
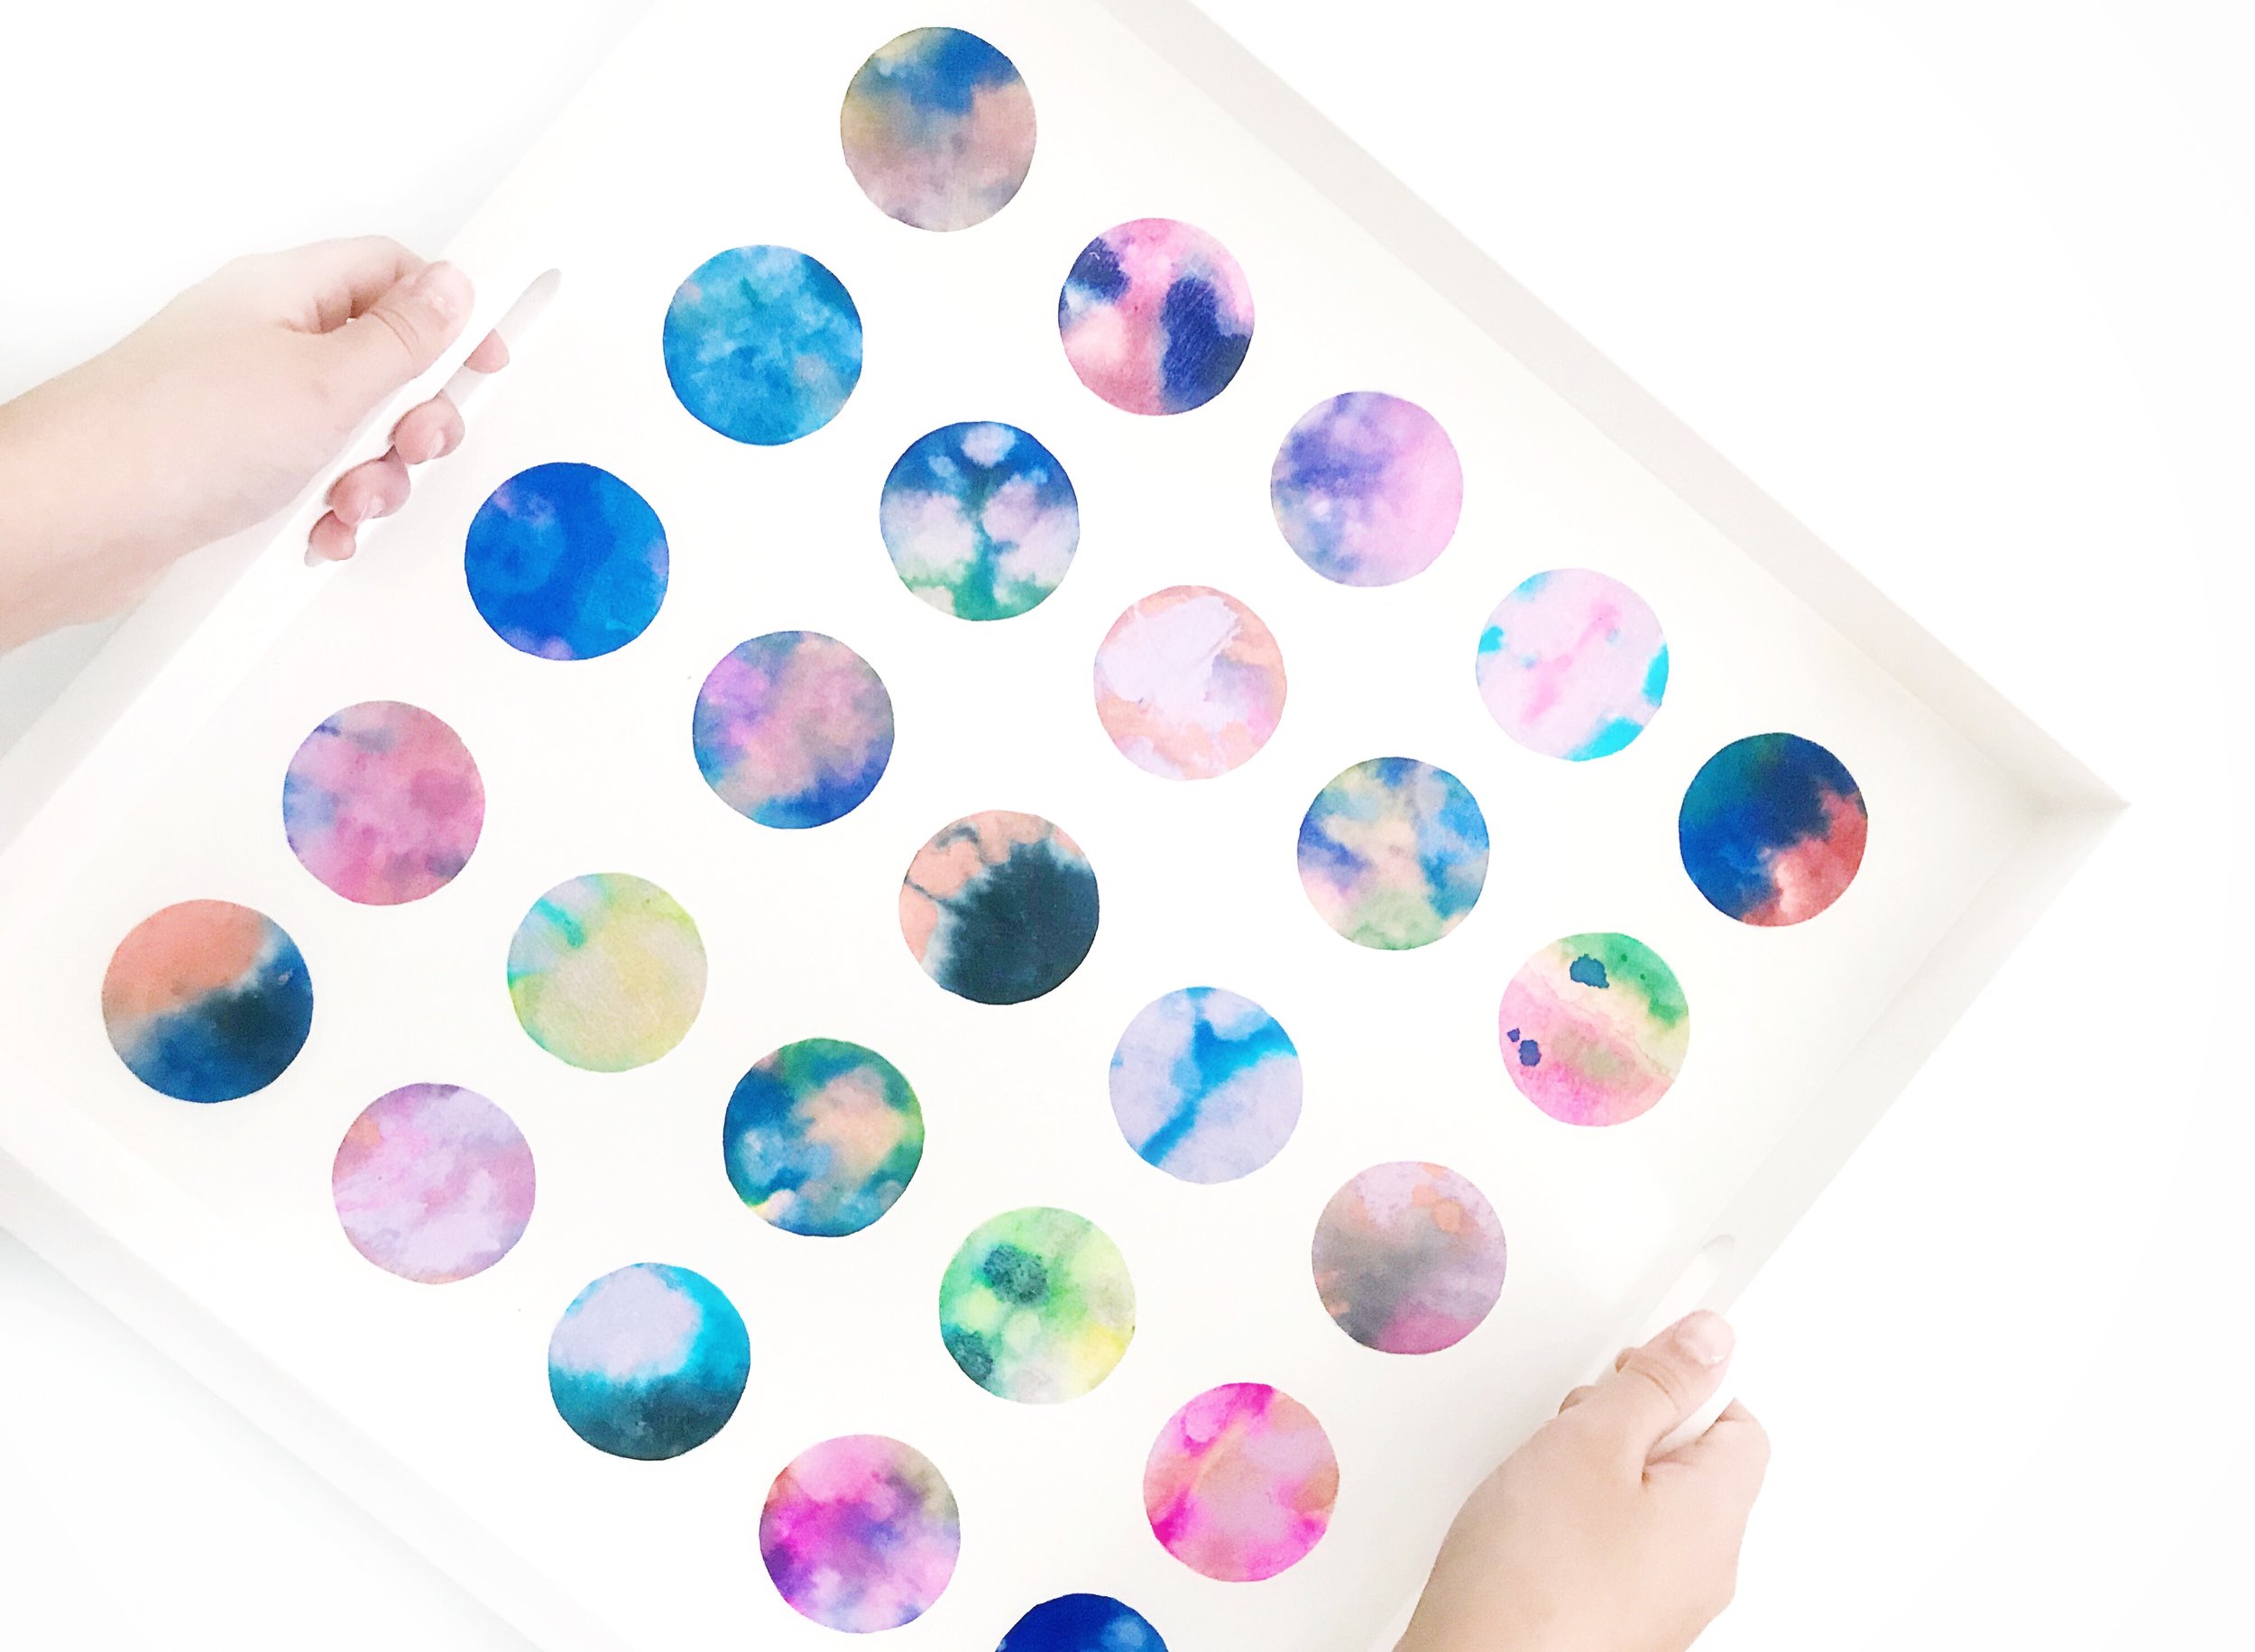
After the dots are dry, it's time to start playing with layout. At this point you might have to resize your dots. You can do this easily by creating a template out of card stock or poster board. Grab a stack of about 6 dots at a time, place the template on top and then carefully guide your scissors around the outer edge of the template. When all of your dots have been sized correctly you will make rows on your tray. Figure out your placement before you commit with the Mod Podge.
Use a small foam brush to apply Mod Podge to the backs of your dots. You can then coat the top layer of your dots with a thin coating of Mod Podge. Mod Podge acts as a sealer and glue. You could use Mod Podge to seal your tray and call it a day. I decided to get fancy with it and use a clear coat epoxy on top of mine. Using epoxy is not necessary, but I had "a look" in mind. I am not going to even attempt to walk you through it, but I will share a video link that demonstrates the process. Skip ahead to 1:32.
*IMPORTANT update*
Since we first shared this DIY we have read more about how serious the use of epoxy is. Please educate yourself and protect yourself on proper use and protective gear . I don’t think the risk is worth the shine. I would just stick with Mod Podge.. using mod podge also means this project could be done 100% by kids.

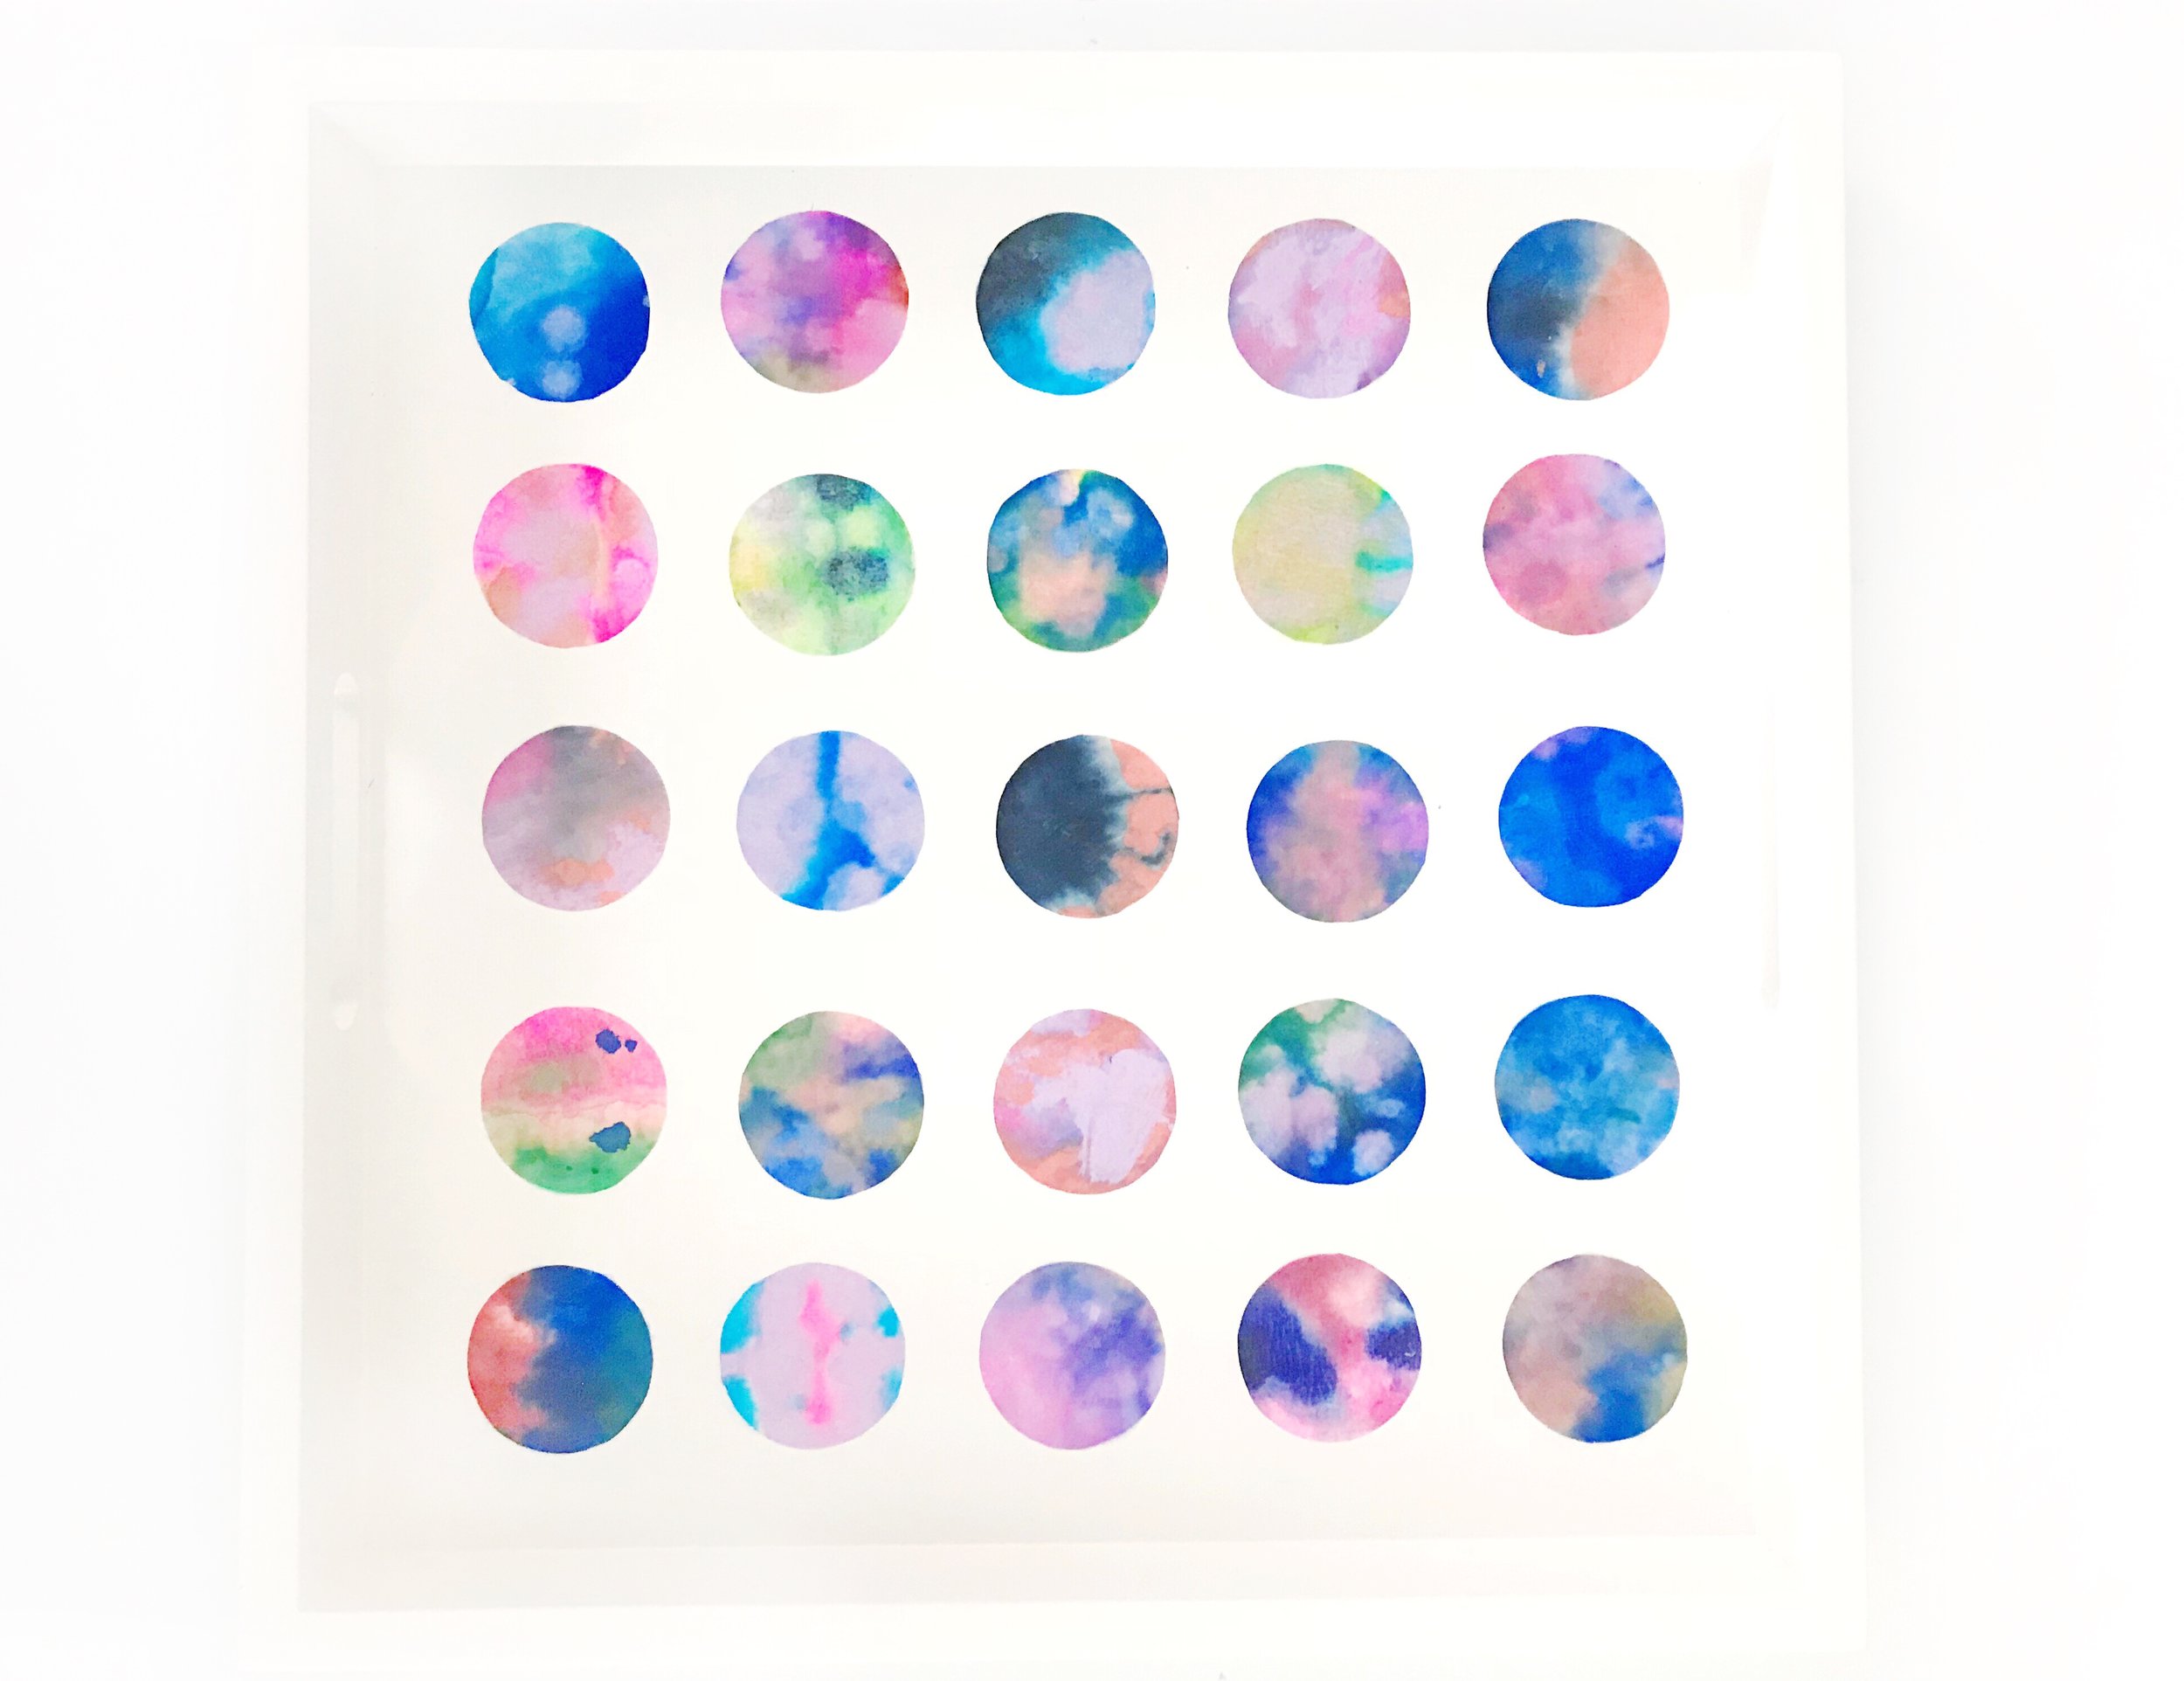
Remember how the students each made two dots? I used the leftover dots to make a tray for their teacher! We will give it to her at the end of the year. : )